Thursday, February 28, 2013

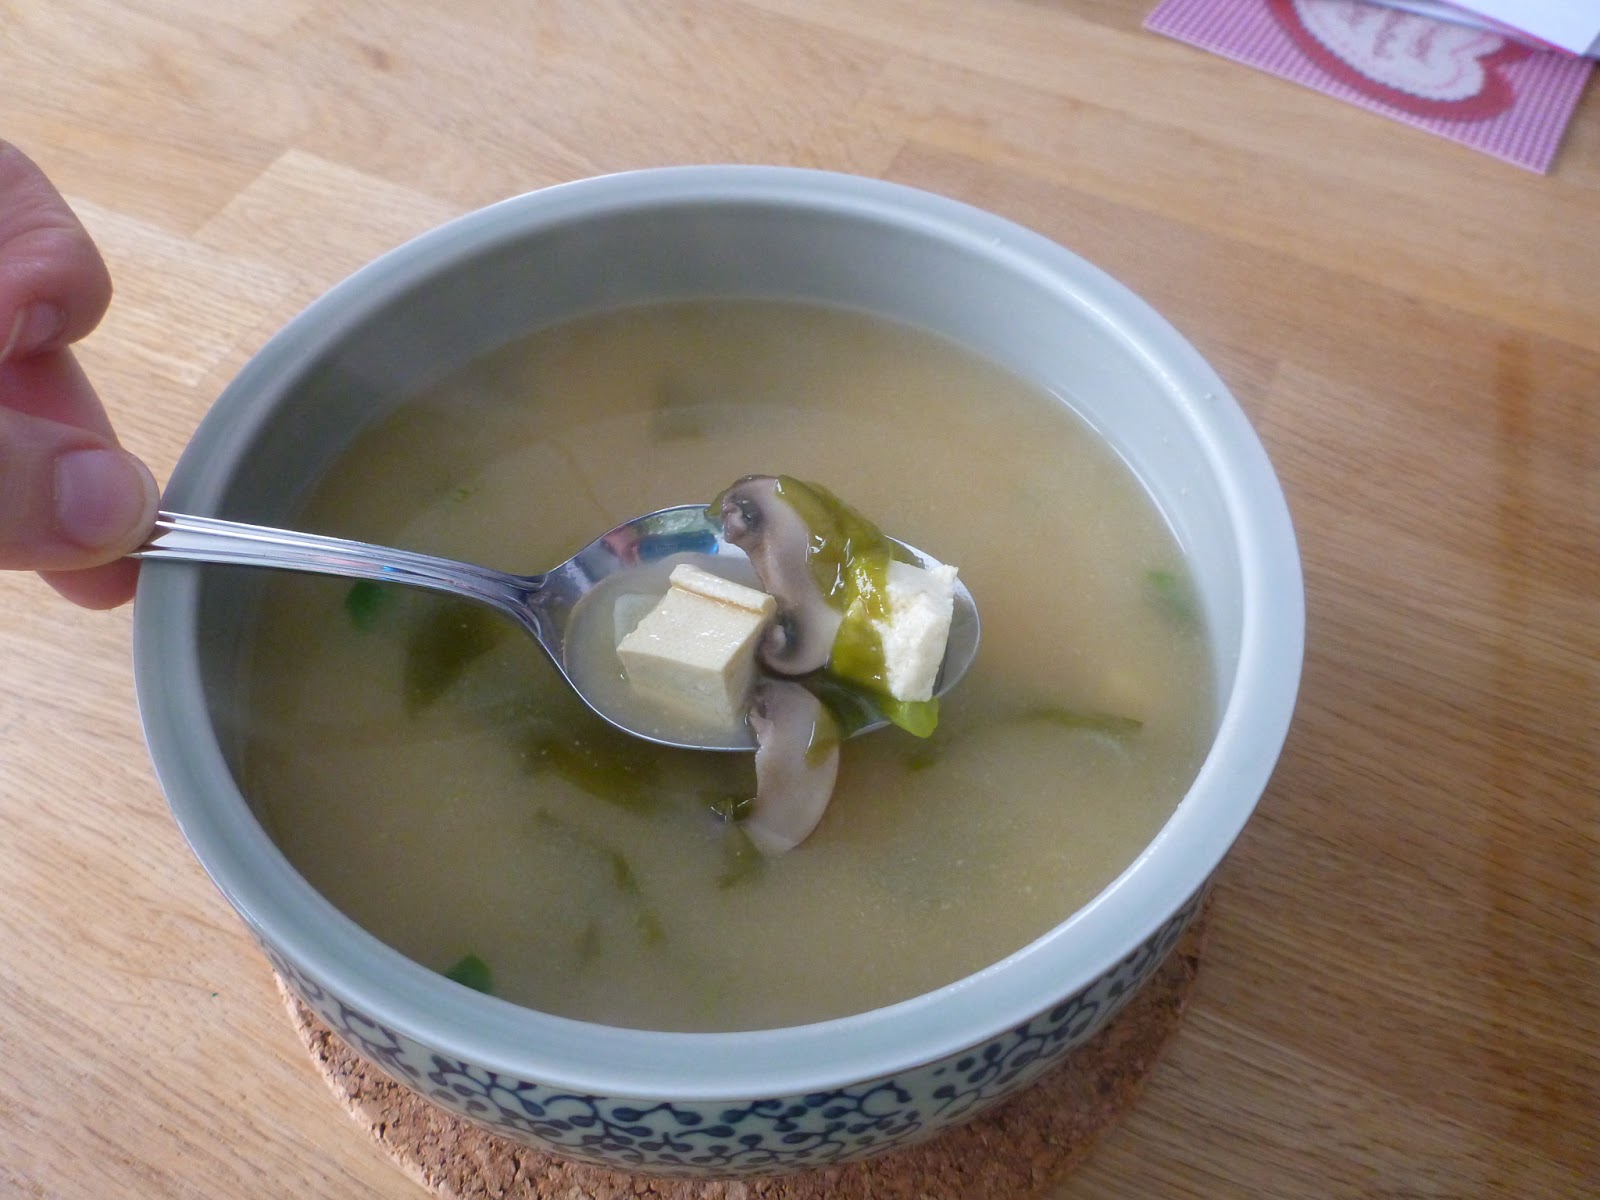
Miso Soup


A bowl of soup is so warm and satisfying, especially throughout the chilly winter months. People should consider replacing that bowl of chicken soup with a way healthier bowl of miso soup! Miso soup is a staple in Japan and you'll find it in Japanese and sushi restaurants. It is often served at the beginning of the meal as a digestive aid. Thankfully, miso soup is super easy to make at home and I would eat it every day if I could!

From Care2, here is a quick list of the top ten benefits of eating miso soup:

1. Contains all essential amino acids, making it a complete protein.
2. Stimulates the secretion of digestive fluids in the stomach.
3. Restores beneficial probiotics to the intestines.
4. Aids in the digestion and assimilation of other foods in the intestines.
5. Is a good vegetable-quality source of B vitamins (especially B12).
6. Strengthens the quality of blood and lymph fluid.
7. Reduces risk for breast, prostate, lung and colon cancers.
8. Protects against radiation due to dipilocolonic acid, an alkaloid that chelates heavy metals and discharges them from the body.
9. Strengthens the immune system and helps to lower LDL cholesterol.
10. High in antioxidants that protects against free radicals.

Here is my quick recipe to make a bowl of miso soup! This recipe makes one bowl - double the recipe if you're making this for two people. You'll need:

-  2 cups of water
-  2 tbsp of miso paste (yellow or white miso)
-  a couple of green onions, diced
-  1 tbsp Wakame (sea vegetable, available in the Japanese section of the grocery store)
-  1/4 block of extra-firm tofu, chopped into cubes (optional)
-  a few mushrooms (optional)
-  chopped garlic rounds (optional)

The key to preparing miso soup is not overheating the miso paste. You don't want to heat this soup, especially the miso, beyond a certain point as the heat will kill all of the beneficial enzymes that makes this soup a nutritional powerhouse.

Bring the water to a boil in a saucepan along with the Wakame, green onion, tofu, mushrooms, and garlic. Simmer until the mushrooms are soft. Reduce the broth to low.

Scoop one cup of broth from the pot out and add the miso paste to it. Stir with a spoon until the miso dissolves. Put the miso/broth back into the pot and stir for 2-3 minutes on low. Do not bring back to a boil as this will kill the nutrients in the soup!

Sunday, February 17, 2013

Smoked Tofu with BBQ Sauce Wrap


This dinner was definitely a culmination of what was in the fridge at the time. Thankfully, it was super tasty and will be one to make over and over again! It is really hard to tell from the pictures what is inside the wrap. It is smoked tofu cooked in BBQ sauce, sauteed veggies, and a Vegenaise-sriracha mixture as an additional dressing.

This dinner is a great way to use up those extra veggies in the fridge! Plus, it is satisfying and delicious. And you don't need to many fancy ingredients. You can substitute regular tofu instead of smoked tofu (although I do recommend the smoked tofu!), or you can use tempeh or Gardein chik'n strips. Pick your protein!


Ingredients:

1 package of smoked tofu, cut into strips
oil for frying (I used grapeseed oil)
BBQ sauce (I used half a bottle of maple chipotle BBQ sauce)

1/2 onion, into slices
1 baby bok choy, chopped
1/2 yellow pepper, into slices
3 cloves garlic, chopped
handful of shiitake mushrooms, sliced

tablespoons of Vegenaise, with 1 tsp of sriracha mixed in, to taste for spiciness

Directions:

Heat a frying pan with some oil on medium heat and saute the strips of smoked tofu, until browned on both sides. At the same time, heat a separate pan with some oil and saute up all of the veggies.

When the tofu is browned, add the BBQ sauce to the pan. Reduce the heat to low. Let the tofu marinate in the sauce, flipping the strips over when necessary, 5 minutes. Spoon the BBQ sauce over top of the tofu after flipping.

Assemble the wrap - put a few slices of tofu in, then your sauteed veggies, and then a bit of the sriracha-vegan mayonnaise mixture.  Serve and enjoy!


Friday, February 15, 2013

Black Pepper Tofu


I regularly get emails and newsletters from VegNews - I highly recommend joining their email list since you'll receive all kinds of recipes, the latest news about vegan products, and articles regarding all things vegetarian! This recipe showed up in my inbox one day and I ended up making it that night! I've been looking for new tofu recipes aside from my usual stir fries and this one was very appealing. It originally appeared in a fantastic vegan recipe blog called Thursdays with Wanda.


If I had to make this dish again, I would definitely use way less black pepper. Now, I'm a girl who loves her meals spicy, but I did find this to be a bit too much for me to handle. I would reduce the amount of black peppercorns to one tbsp instead of three. I also used half of a red onion in place of the shallots, and a bunch of green onions in place of the leeks. I used only 2 tbsp of soy sauce and a little bit more ginger than the original recipe as well. I put the tofu over top of steamed broccoli and bok choy, as well as brown rice. Here is a link to the original recipe, but I will post my modifications below. All in all, it was a very easy recipe to make that would work great after a long day at work. It is very filling and nutritious!


Ingredients:
1 package firm tofu
1 tablespoon fresh black peppercorns
1 teaspoon red pepper flakes
5 cloves garlic, minced
1/4 cup olive oil
2 tablespoons soy sauce
1 teaspoon brown sugar
1 teaspoon rice vinegar
1" fresh ginger, minced
1/2 red onion, minced
1 bunch green onions, cut into 1" sections

Directions:
1. Cut the tofu into small blocks and let them drain on paper towels for 15 minutes.
2. Make the sauce: Crush up the black peppercorns into coarse flecks with your mortar and pestle (or in a spice grinder), then mix in the red pepper flakes, minced garlic, olive oil, soy sauce,brown sugar, and rice vinegar.
3. In a pan over medium high heat, swirl in some oil and then sear the tofu in batches until all sides are crispy, or about 2 minutes per side.
4. Add the ginger and onion to the tofu and saute for 2 more minutes. Add the sauce and the green onions. Cook for 5 more minutes. Add more soy sauce to taste.
5. Serve over some brown rice, and steamed veggies (I used bok choy and broccoli).

Tuesday, February 5, 2013

Vegan Gyoza and a Japanese-Themed Dinner


It all started with a trip across the border to Trader Joe's. We don't have any Trader Joe's stores in Canada, or any just across the border from Southern Ontario/Toronto area. The closest store is in Rochester, New York, so sometimes a road trip is in store and so is a fun grocery shopping trip!

I went to Trader Joe's for the first time last summer when on a little vacation to Put-in-Bay, Ohio with one of my best friends. We stopped at a location in Cleveland and I came home with bags full of vegan snacks that were entirely different from what I could find at stores at home. This visit was similar to that time as I exited the store with Vanilla Jo Jo's, Onion Ring chips, Roasted Coconut Chips, an assortment of various Clif bars, and all kinds of other goodies. Amongst those goodies was this bottle of Trader Ming's Gyoza Dipping sauce. With the inspiration of using this sauce for dinner, I decided to attempt to make vegan gyozas from scratch. A gyoza is an Asian dumpling filled with all sorts of sauteed veggies.

What started with an idea of making vegan gyoza resulted in tonight's dinner: a full-out Japanese buffet of gyozas, sushi, and soba noodles! It was a bit time consuming and resulted in a lot of dirty pots and pans...but it was incredibly delicious and well worth the work!

Vegan Gyoza!
Since I was unable to find wonton wrappers without egg in them (you might be able to find these at an Asian grocery store), I opted to make mine from scratch. I used this recipe from VegWeb and it turned out great. I also used this recipe for the filling. You will need a LOT of elbow grease when you're kneading the dough (unless you have a dough-kneading attachment for your stand mixer or a bread maker!), and you will also need a lot of elbow grease for rolling out the dough. The dough is very firm and difficult to roll out, but try your best. I was able to come out with about 12 three inch squares, along with some leftover dough. You should be able to get at least 16 squares, depending on how strong you are!

Vegan Wonton Wrappers

2 cups all-purpose flour
1/2 tsp salt
1/2 cup warm water

1.  Sift together the flour and salt in a bowl. Slowly stir in the warm water. The dough will be very stiff.
2.  Knead the dough on a floured surface until smooth, about 15 minutes. Put the dough back into the bowl and cover it with a towel. Let the dough stand for about 20 minutes.
3.  Roll out half of the dough as thin as you can. Cut into 3" squares using a pizza cutter or knife. Repeat for the other half of the dough. You can also use this recipe to make spring rolls, just cut the dough into bigger squares.

Vegan Gyoza

2 tbsp oil, divided
1/3 cup carrots, finely chopped
3-4 cloves garlic, finely minced
1/3 cup celery, finely chopped
1 tbsp sesame oil
1/2 cup shiitake mushrooms, finely chopped1-2" piece ginger, peeled and finely chopped
red pepper flakes, to taste
black pepper, to taste
1/4 cup green onions, finely chopped
2 tbsp tamari
wonton wrappers (store-bought or from recipe posted above)
2-6 tbsp water, for steaming

1.  To prepare the filling: Over medium-high heat, add 1 tbsp of oil to a hot skillet. Once the oil is hot, drop in the carrots and garlic and cook for 4 minutes, stirring constantly. Add the celery and cook for 2 minutes, stirring constantly. Next, toss in the sesame oil, mushrooms, cabbage, ginger, black pepper, and chili flakes and coat well with oil.
2.  Cook this mixture for another 2 minutes, then add in the green onions. Stir in 2 tbsp tamari. Once all of the veggies are soft, transfer to a bowl and allow to cool for 10 minutes.
3.  Please a tsp of filling in the center of each wonton wrapper. Moisten the edges with a little bif ot water, fold over, and crimp the edges to seal.
4.  To cook: Add 1 tbsp of oil and heat over medium-high. Drop in your dumplings and cook for 2-3 minutes per side until lightly browned. When both sides are lightly browned, add in 2-3 tbsp of water and cover with a lid. Turn the heat down to medium and allow the water to completely evaporate.

*** Please note *** These are the instructions for the original recipe. I found that adding water to a hot pot with oil in it was a little bit too dangerous for me. I recommend steaming the gyozas by using a separate steaming pot over a pot of boiling water.

5.  Gyozas are done when they are entirely translucent. If there are still opaque parts,  add more water, cover and cook. Flip them over if they get too brown on one side. You may have to repeat this process. If you're using a steaming pot, flip them as necessary.
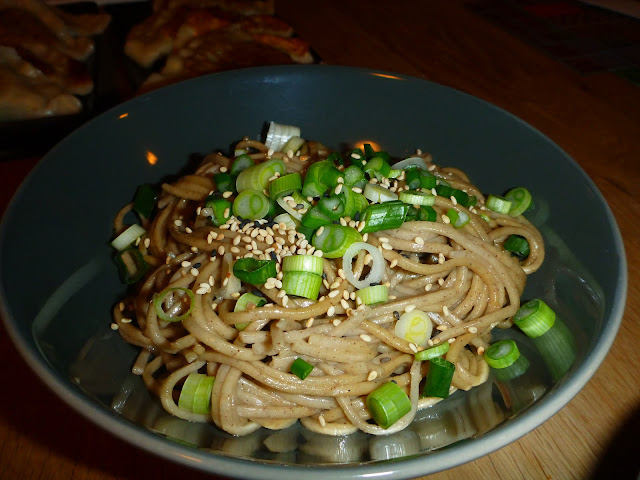
Sesame Soba Noodles with Green Onion

Soba noodles are a healthy buckwheat noodle used in Japanese cuisine. You should be able to find them at most grocery stores. Cook the noodles according to the directions on the package. Drain the noodles, then add them back to the pot along with some sesame oil and soy sauce. Heat through and serve. Top with chopped green onions and toasted sesame seeds.

I actually ended up adding some of the Trader Joe's Gyoza sauce to the noodles and it was absolutely delicious! It added a nice kick of ginger and more sesame flavour. Yum!

Veggie Sushi!
Making veggie sushi is not as hard as it looks! All you'll need is sushi rice, veggies to put inside (cucumber and orange/yellow pepper), and nori (seaweed) papers to wrap everything up. You can also put some toasted sesame seeds inside.

Cook the sushi rice according to the directions on the package. Using 1 cup of uncooked sushi rice will make you more than enough rice to make sushi. Once the rice is cooked, put it into a bowl and add 2 1/2 tbsp of seasoned rice vinegar and 1/2 tbsp of sugar.  Let the rice cool down.

On your nori sheet, lay out a row of sushi rice, and then your cucumber and pepper slices. Add some toasted sesame seeds. Then, put a little bit of rice vinegar along the top edge (where you have put your rice and toppings down) in order to allow it to stick together when you roll it all up. You can use those fancy tatami mats to roll up the sushi, or you can just use plastic wrap. Roll up the sushi. Then, you can cut it into 8 bite-sized pieces.

There are tons of books and websites about making sushi. I have a great book called Vegetarian Sushi that outlines the basics of making sushi and includes tons of different recipes for many veggie rolls.


And there you have it - a dinner that can rival any that you would find at a Japanese restaurant, and one that definitely has no meat or fish in sight!

Monday, January 28, 2013

Chipotle Lentil Burgers and OMG Onion Rings!


I have owned the Appetite for Reduction cookbook for at least a year and I just never got around to making anything from it! That might sound pretty crazy as there are so many awesome looking recipes in it. I do tend to collect vegan cookbooks and then I find all kinds of amazing recipes online that I end up trying...and then I forget about the cookbooks I own! Well, I am very impressed these two recipes out of Appetite for Reduction - the Lentil Chipotle Burger and the OMG Onion Rings! The burgers are healthy, tasty, and all sorts of spicy. The onion rings are baked, not fried, and totally crispy!


The only substitutions that I made included using Panko bread crumbs in place of the whole wheat bread crumbs that the recipes call for. I couldn't find whole wheat bread crumbs at the grocery store, and the regular bread crumbs contained all sorts of icky ingredients...including milk! So, I went with the Panko bread crumbs that are vegan. They worked wonderfully for the onion rings in place of regular bread crumbs. For the burgers, I ended up adding more bread crumbs than the recipe called for because the burgers weren't quite sticking together at first. This is likely because the Panko bread crumbs are airy and lighter than regular ones. Adding more Panko crumbs definitely solved the problem as I was able to form the lentil burgers into patties without any issues.

Also, I would definitely omit the salt next time I make the onion rings. They ended up being a bit too salty. Otherwise, they are super delicious and crunchy.  Here are the recipes!

Lentil Chipotle Burgers (Makes 6):

1 teaspoon olive oil
1 small red onion, cut into medium dice
1/2 pound zucchini, halved lengthwise and sliced 1/2 inch thick
3 cloves garlic, minced
1 cup lightly packed fresh cilantro, chopped (stems and leaves)
1 (15 ounce) can cooked lentils, drained and rinsed (1 1/4 cups)
1 cup bread crumbs
1/4 cup chipotles, seeds removed, with adobe sauce
2 tablespoons soy sauce
2 teaspoons red vinegar
1/4 teaspoon salt
2 teaspoons smoked paprika

Preheat a large pan over medium-high heat and add the olive oil. Saute the onion for about 3 minutes. Add the zucchini, garlic, cilantro, and a pinch of salt, and saute for 7 to 10 minutes, until the zucchini is soft.

Transfer the zucchini mixture to a food processor. Add all the other ingredients except for 1/2 cup bread crumbs. Pulse until mostly smooth, but there should still be a little texture. Transfer to a large mixing bowl.

Preheat the pan (the same one you already used to saute in is fine) over medium heat. Add the remaining 1/2 cup of bread crumbs to the burger mixture and use a fork to thoroughly combine.
Divide the burger mixture into six equal pieces.

Form the burger portions into patties and cook for about 12 minutes, flipping the burgers often, until they are nicely browned on both sides. Add more olive oil as necessary. Do three at a time for best results.

OMG Onion Rings:

2 vidalia onions (about a pound), or other sweet onion
1/2 cup plus 2 tablespoons all purpose flour
2 tablespoons corn starch
1 cup cold soy milk
1 teaspoon apple cider vinegar
1 cup whole wheat bread crumbs
1 teaspoon kosher salt
2 teaspoons olive oil

Slice onions into 3/4 inch thick rings. Separate the rings and place in a bowl.

Preheat oven to 450 F. Line a rimmed 12×18 baking sheet with parchment paper and set aside.

Now you’ll need two bowls for batter and breading. In one bowl, dump in the flour and cornstarch. Add about half of the almond milk and stir vigorously with a fork to dissolve. Add the rest of the almond milk and the apple cider vinegar, and stir to incorporate. Set aside.

In the other bowl, mix together the bread crumbs and salt. Drizzle in the oil and use your fingertips to mix it up well.

Get a conveyor belt going. From left to right, have the onions, the flour mixture, the breadcrumbs mixture and lastly the baking sheet. Dip each onion slice into the the flour, letting the excess drip off. Transfer to the breadcrumbs bowl and use the other hand to sprinkle a handful of breadcrumbs over the onion, to coat completely. This may take a bit of practice. Carefully transfer each onion to a single layer on the baking sheet. Make sure you use one hand for the wet batter and the other for the dry batter, or you’ll end up with club hand.

Spray rings lightly with cooking spray and bake for 8 minutes. Flip, and bake another 6 minutes. Rings should be varying shades of brown and crisp.

Friday, January 18, 2013

Baked Falafel and Hummus


I made this over the summer but didn't get around to posting about it until now! I was sorting through some old photos and remembered....hey, those falafels! That hummus! That was a delicious meal. I will definitely have to make this again sometime soon.

There are some vegan falafel balls that I'm able to buy at my local grocery store, but these ones blow them right out of the water. Plus, they are baked, making them healthier than other fried versions out there. (Feel free to fry these up if you'd prefer, of course!)

Baked Falafels (recipe originally posted on Epicurious):

1 cup dried chickpeas (2 1/2 cups cooked)
1/2 large onion, roughly chopped (1 cup)
2 tbsp finely chopped fresh parsley
2 tbsp finely chopped fresh cilantro
1 tsp salt
1/2-1 tsp red pepper flakes
4 cloves of garlic
1 tsp cumin
1 tsp baking powder
4-6 tbsp flour

1.  Soak the chickpeas for 8 hours or overnight.
2.  Drain the chickpeas well, and put into the food processor with onion, parsley, cilantro, salt, garlic, and cumin. Pulse the mixture until well chopped and blended, but not pureed. Sprinkle in the baking powder and flour; pulse. If the chickpea mixture doesn't stick together, you might need to add more flour.
3.  Move the mixture to a bowl with a lid and chill for several hours or overnight.
4.  Form patties out of the mixture and bake at 400 degrees F, turning once, until lightly browned on both sides (22-26 minutes).


What would a falafel  be without hummus! I made a small salad with baked falafels and hummus on the side to dip the falafels in, or to mix with the salad. Or, you could take the greens, falafels and hummus and put it into a wrap or pita bread.

The hummus recipe I used is from the amazing cookbook, Veganomicon (a must-own for anyone interested in healthy cooking!). At the time that I made this hummus, I had lots of fresh herbs growing in my garden. I added some fresh Zaa'tar leaves in this mixture, since it can be used sprinkled on the top of hummus. It was my first time ever growing zaa'tar and I hadn't even really heard of it until I bought it! It is a wild type of oregano that grows in Israel. It has a flavor similar to oregano, thyme, and marjoram.


Hummus (from Veganomicon):

2-15 oz cans of chickpeas, drained and rinsed (or 3 cups of soaked chickpeas from dried)
1/3 cup olive oil
1/4 cup lemon juice
3 tbsp sesame tahini
3 cloves garlic (or 1 head roasted garlic)
1/4 cup water (more or less for desired thickness)
ground cumin, coriander, and paprika, to taste
salt and pepper, to taste

Mix everything together in the food processor except for the water. Slowly add the water to the desired consistency.

I sprinkled zaa'tar and smoked paprika on top of the whole mixture! Yummmmm!

Monday, January 14, 2013

Vegan S'mores! Yummy Graham Cracker, Marshmallow and Chocolate Mmmm....


Here are some of the Christmas treats that I baked up for the holidays! I went a little less traditional this year and skipped the typical Christmas cookies. While I do love those kinds of cookies, I wanted to challenge myself to something completely new - making S'mores from scratch!


First, I made the graham cookies that make up the base of this treat. I researched a couple of vegan S'mores recipes online, and ended up combining the ones found at Vegan Yum Yum and Manifest Vegan to create my own recipe! If you do need to make them gluten-free, the recipe at Manifest Vegan looked great to use.


To make the graham crackers, you'll need:

2 1/2 cups whole wheat flour
1 cup all purpose flour
1/2 tsp baking powder
1/2 tsp baking soda
1 tsp salt
1 tsp cinnamon
1/2 cup Earth Balance (or other vegan margarine)
1/2 cup dark brown sugar
1 tsp vanilla
1/3 cup soy milk
1/4 cup agave
1/4 cup molasses

1. Preheat the oven to 350 degrees F.
2. In a large bowl, whisk together the whole wheat flour, all purpose flour, baking powder, baking soda, and salt.
3. In a separate bowl, cream together the Earth Balance and the sugar until smooth. Add the soy milk, vanilla, agave, molasses, and cinnamon. Mix everything together.
4. Gradually add the flour mixture to the sugar mixture until everything is incorporated. A stiff dough should form.
5. Divide the dough into two sections and pat into disks. Chill each disk briefly for about 5 minutes in the freezer, and then roll out between two pieces of parchment paper until it is about 5mm thick.
6. Using a pizza cutter or a knife, cut the dough into squares that are approximately the same size. Using the tip of a chopstick, poke holes into the top of each square.
7. The dough will be flexible and it will be easy to pull off the parchment paper. Place each square on an ungreased cookie sheet and bake for 12-14 minutes until they are firm and a little bit darker around the edges. Let cool completely.
8. Repeat with the remaining dough. I ended up with a TON of graham crackers, but remember that you'll need one for the top and one for the bottom of each s'more!


Now, to make the marshmallow part of the S'mores:

1-oz bag vegan marshmallows (Dandies is the brand I used)
1 tbsp Earth Balance

In a small saucepan, combine the Earth Balance and marshmallows over medium heat. Stir constantly until they melt together. Stir until smooth. Add a little bit more Earth Balance if the mixture starts to stick to the pot.

Put a spoonful of marshmallows between two graham cookies. Warning - this can get a bit messy! I also needed to double the marshmallow recipe to use up all of the graham crackers that I made.


Next, the chocolate topping for the S'mores:

You'll need one bag of non-dairy semi-sweet chocolate chips (I used Camino brand). Melt the chocolate over a double broiler, or in the microwave in 30 second increments (stirring between each 30 seconds). Coat each S'more with chocolate.

They're also good without the chocolate for those who don't care for chocolate. I love chocolate so of course I added lots of chocolate on top of each one!


The other sweets that I made for Christmas are two Post Punk Kitchen favourites of mine: Peanut Butter Blondies (pictured above) and Banana Everything Cookies (shown below).