Showing posts with label Dinner. Show all posts

Monday, October 21, 2013

Ooey Gooey Vegan Mac N Cheeze


Ever since I tasted the super delicious Mac N Cheeze at Kindfood in Burlington, ON, I have wanted to emulate this same dish at home. I think I've come pretty close here, and even though it isn't identical, it was definitely a success! While the one at Kindfood is completely gluten-free, I chose to use some regular wheat flour in this recipe, though I did pick out some brown rice noodles to try.  The recipe that I found online that seemed most like the one I tried at the restaurant was from Vegan Yum Yum, although I did modify the recipe a little bit.

Ingredients:
1/3 cup Earth Balance
1/4 cup all purpose flour
2 1/2 tbsp tamari
1 tbsp lemon juice, fresh
1 tbsp sweet/white miso
1 tbsp tahini
1 tbsp tomato paste
1 tsp paprika
1 tsp Dijon mustard
1 1/4 cup soy milk (or other non-dairy milk)
1/3 cup nutritional yeast
salt and black pepper, to taste

Heat the saucepan and add the Earth Balance. Once it is melted, add the flour and whisk constantly until a paste forms. Don't let your pot get too hot. Add tamari, lemon, miso, tomato paste, paprika, Dijon, and whisk. Slowly pour in the soy milk, whisking constantly. Add the nutritional yeast and mix. Cook until it thickens up for about 5 minutes. Add salt and pepper.

Cook a package of macaroni or other shaped pasta, and toss with the sauce. Top with Daiya cheddar cheese and whole grain bread crumbs. Bake at 400 degrees for 20-25 minutes.


Thursday, October 17, 2013

A Very Vegan Thanksgiving! Chickpea Cutlets, Mashed Potatoes, Mushroom Gravy, and Roasted Broccoli!


It was Canadian Thanksgiving this past Monday, so we went all out with a hearty traditional meal...vegan-style, of course! Justin and I were in the kitchen for a good while and made this delicious meal together. It was one of those times where all of the pots and burners were used on the stove top and so many dishes piled up in the kitchen sink. But, it was well worth the time (and the mess!). I chose dishes from Isa's holiday recipes over at Post Punk Kitchen because they always turn out so great! We went with Doublebatch Chickpea Cutlets, Fluffy Mashed Potatoes, Savory Mushroom Gravy, Roasted Broccoli & Asparagus, and the Cosmos Apple Pie from the Vegan Pie in the Sky cookbook.


I didn't fully follow the recipe for the broccoli - first of all, we added asparagus, too. Next, we added some fresh and dried herbs and spices as I would typically use for roasted vegetables. We roasted the vegetables in olive oil, along with the herbs, on a baking sheet as per the recipe.


The pie was baked to perfection and was super delicious! For an added amount of yum, I sprinkled some maple sugar on top in place of regular sugar, along with the cinnamon.

And another thing to be thankful for? This was way too much food for only two people! So, we had lots of leftovers to eat. The chickpea cutlets went pretty fast, but we ended up with such a huge amount of mushroom gravy that I'm thinking of making more cutlets and potatoes just to use up the gravy! It is Thursday now and I've still got some leftover potatoes, mushroom gravy, and pie. For the last couple of days, I've had some pretty fantastic lunches at work! Happy Thanksgiving to my fellow Canadians, and Early Happy Thanksgiving to my American readers!

Friday, August 30, 2013

Caribbean Peas and Rice...with Kale!


I love the combination of beans and rice and this recipe was a great opportunity to make a new dish using those healthy ingredients. This one is reminiscent of past travels in the Caribbean and dining on local cuisine. Peas and rice are a staple there, and it just happens to also be vegan! This recipe is from Happy Herbivore and also uses an ingredient that's a fan-favorite...kale!

The recipe calls for jerk seasoning, which I did not have on hand. However, I had all of the spices required in order to make a jerk spice blend, so I was able to make it from scratch! I used this one from Allrecipes, minus the oil:

2 tbsp dried minced onion
2 1/2 tsp dried thyme
2 tsp ground allspice
2 tsp black pepper
1/2 tsp ground cinnamon
1/2 tsp cayenne pepper
1/2 tsp salt

Combine all of those ingredients together. Any extra seasoning that you don't use could be stored in a small jar for next time!

Here's the recipe - this one makes enough to serve 4, or you can save it for lunch the next day like I am if you're dining solo!

1 bunch scallions, white parts sliced thin
2 whole celery stalks, minced
4 whole garlic cloves, minced
2 tbsp fresh ginger root, minced
4 whole fresh thyme leaves
1½ tsp hot sauce
2 tbsp ketchup
¼ tsp turmeric
1 bunch kale, chopped into small pieces
15 ounces black-eyed peas, drained and rinsed
1 cup brown rice, uncooked
2½ cups vegetable broth
2 tsp Jamaican dried jerk seasoning (using recipe above)

Combine rice with 2 cups of vegetable broth in a large pot and set aside. Line a skillet with a thin layer of broth and add scallions, celery, garlic, ginger, thyme, hot sauce and 1 tsp jerk seasoning. Cook over high heat, adding additional broth as necessary, until the celery is soft, about 3 minutes. Add remaining jerk seasoning, stirring to coat. Transfer to rice, add 2 squirts of ketchup and turmeric, stirring to combine. Cover and bring to a boil. Once boiling reduce heat to low and simmer 40-50 minutes, until rice is cooked.  You might have to add more broth as the rice absorbs the liquid. Once rice is fully cooked, stir in black-eyed peas and greens. Let the greens wilt slightly. You can serve with hot sauce or add a little bit of salt, if needed.

Wednesday, July 24, 2013

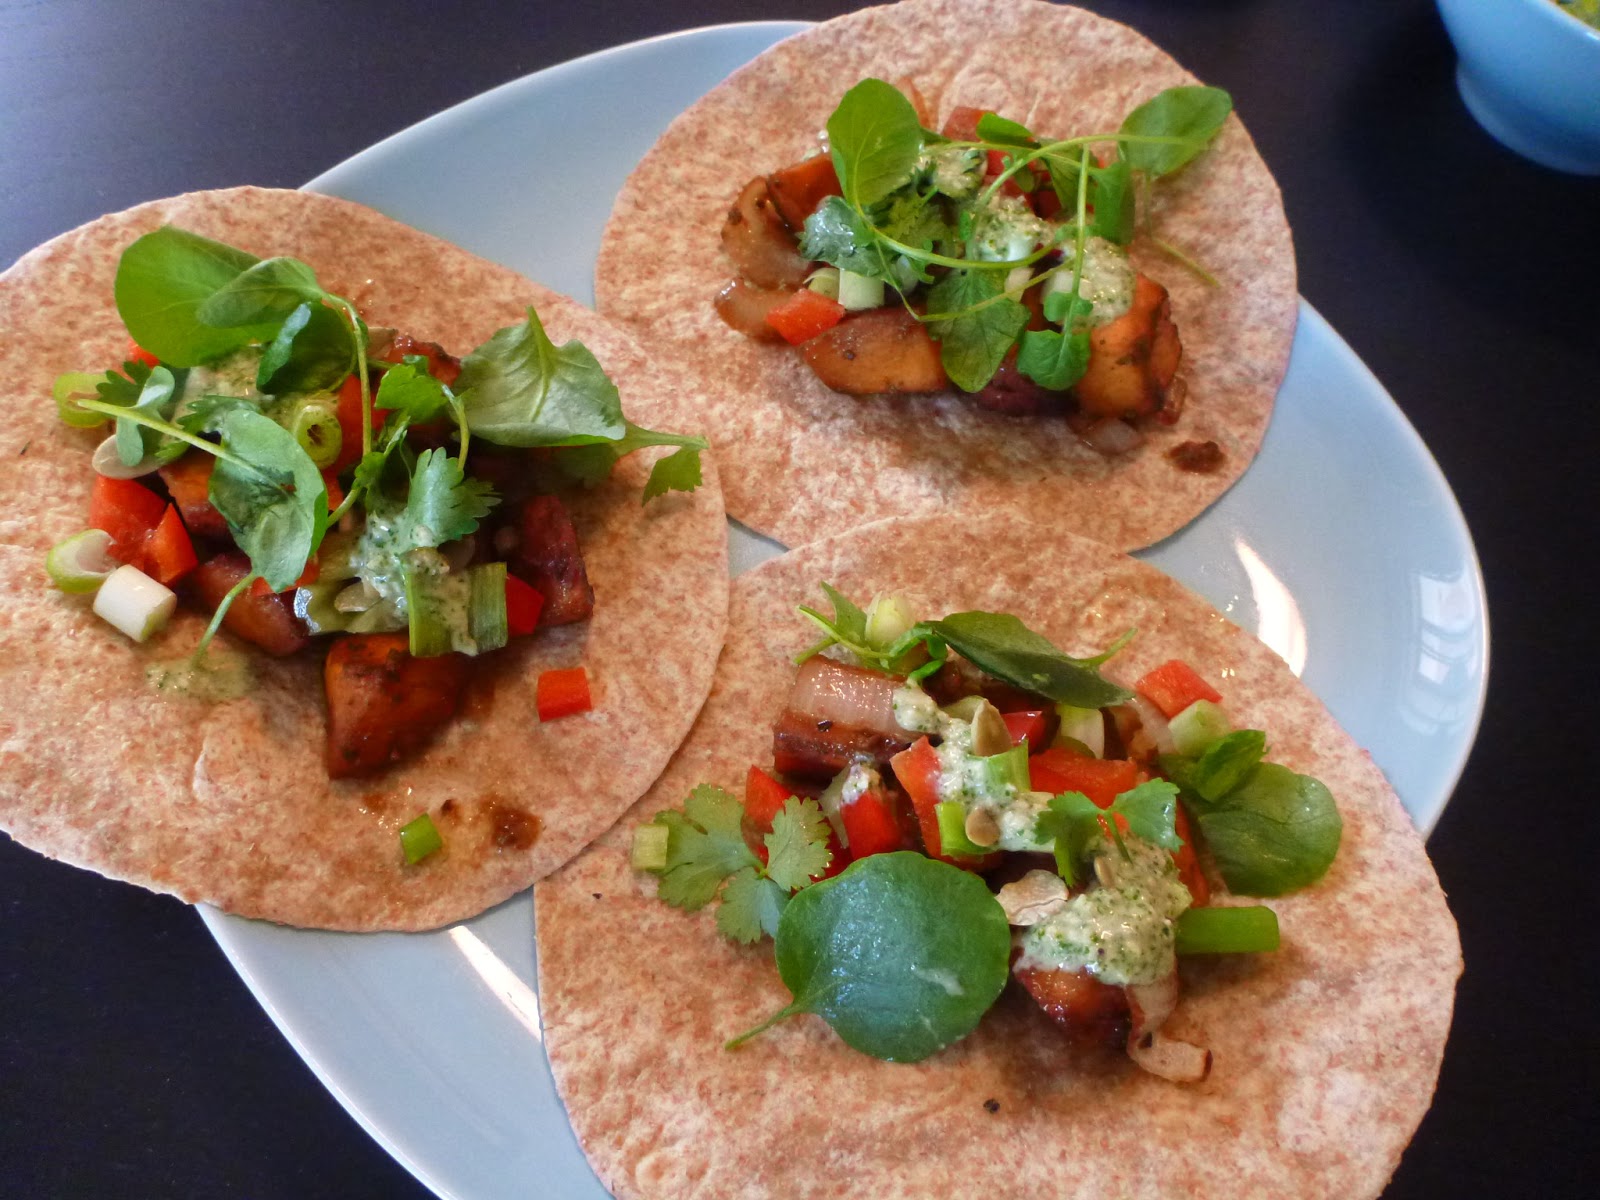
Miso-Maple Sweet Potato Tacos


In my never ending search of delicious food and recipes to try online, I came across this one at The Kitchn that caught my interest. I'm always up for trying new Mexican-inspired recipes since some of my go-to meals include burritos, tacos, and eating as much re-fried beans and rice as I can. This one included one of my favorite foods, and one that I'm trying to eat more of since they're so good for you...sweet potatoes! Plus, the words...miso....maple syrup...sweet potatoes...really, how could you go wrong!


This recipe was delicious and perfect as it was - I didn't feel the need to alter any ingredients and the quantities were bang-on! It was pretty easy to make, especially since I bought my sweet potatoes pre-cut and pre-washed. I doubled the amounts of the miso-maple glaze since I think I had double the amount of sweet potatoes on hand, which truly shows since I have a lot left over. This would be fantastic re-heated for lunch tomorrow though, which I'll be doing!

Sweet Potatoes, fresh from the oven

Here's the recipe!

Glazed Sweet Potato Filling
2 tablespoons miso paste
2 tablespoons maple syrup
2 tablespoons rice wine vinegar
2 medium sweet potatoes, unpeeled and chopped into small cubes
1 small red onion, chopped
Olive oil

Toppings
whole wheat or corn tortillas, to put everything inside 
red pepper, chopped
green onions, chopped
hot pepper or jalapeno, chopped
cilantro 
toasted pepitas (pumpkin seeds)
sprouts or greens

Cilantro-Coconut Sauce
1/2 cup light coconut milk
1/4 cup cilantro leaves
1/4 cup basil leaves
1 scallion, green and white parts, chopped
1/4 cup toasted pepitas (pumpkin seeds)
1 lime, zested and juiced
1 small garlic clove
Splash of Sriracha hot sauce (optional)
Pinch of sugar (optional)
Salt and freshly-ground black pepper, to taste

Heat oven to 400°F. Whisk the miso paste, maple syrup, and vinegar together in a small bowl. Spread sweet potatoes and onions in a single layer on a baking sheet (you might need 2 baking sheets). Drizzle with a little olive oil, and then liberally brush the glaze over the vegetables.

Bake in a 400 degree oven for 20 to 30 minutes (it took me 40-45 minutes to get the potatoes soft since my sweet potato cubes were a bit larger). The time will vary depending on the heat of your oven and the size of your sweet potato cubes. The onions will likely be done first so be sure to watch and take them out when they're nicely browned but not burnt. When the sweet potatoes are finished, remove from the oven, taste and add another brushing of glaze if you wish.
Serve on warm corn tortillas with cilantro-coconut sauce (see below) and fixings such as avocado, sprouts, cilantro, and pepitas.
In a food processor, pulse all cilantro-coconut sauce ingredients together until just combined. Serve alongside the tacos.

Delicious Toppings!


Monday, May 20, 2013

Vegan Baked Tacos


From the photo above, it's hard to tell exactly what this meal is other than a mound of Daiya cheese, jalapenos, and salsa. It's a recipe called Baked Tacos from Vegetarian Times magazine (March 2003). I adapted this one a little bit to make it vegan, and also added a couple more ingredients that I enjoy (mostly the onions). This is a really easy recipe to make and quick to prepare - it is sure to be a new winner for dinner!


It also makes a LOT of food. Unless you have a family of four or more people, you'll probably have some leftovers. These re-heat really well and are really yummy the next day.

I'm not really sure "tacos" is the right word to describe these. They are more like baked Mexican wraps, smothered in salsa and cheese.

Ingredients:

8 - 8" flour tortillas
1 - 15oz can refried beans
1 package of baked tofu, cut into 16 long strips
1 jalapeno pepper, chopped
1/2 small red onion, chopped
Daiya cheddar shreds
chopped fresh coriander for garnish
chopped green onion for garnish
1 1/2 cups salsa

Directions:

1.  Preheat the oven to 450 degrees. Spray 9x13" baking dish or larger with non-stick cooking spray.
2.  Starting with 1 tortilla, spread half of the tortilla with 2 heaping tablespoons of beans, then 2 slices of tofu, 1 tbsp jalapeno, 1 tbsp red onion, 1 tbsp Daiya. Wrap tightly and place in the baking dish.
3.  Repeat with the rest. Arrange all in the baking dish. Pour salsa on top, sprinkle with Daiya. Cover the baking dish with foil.
4.  Bake for 20 minutes or until filling is heated through. Top the tacos with cilantro and green onions.

Sunday, April 28, 2013

Black Bean Burgers with Tempeh Crisps

Black Bean Burger with all the toppings!

The Post Punk Kitchen Top 100 for 2012 alerted me to the fact that archived editions of Vegetarian Times magazine are available to read for free via Google Books! BTW - if you haven't looked through the PPK Top 100 list, you should check it out for all kinds of wonderful vegan things that came out last year! Anyway, while looking through the old magazines, I came across this recipe for Black Bean Burgers with Tempeh Crisps that I decided to try! 

The recipe is also available over at their website, where I also discovered that they post all of the recipes from their magazines (also available for free!). Now, you have hundreds and hundreds of recipes to try out. Only a few of their recipes are vegan or can be made vegan, so watch out for those recipes that have dairy or eggs.

Tempeh Crisps
The black bean burgers were super yummy, but I thought it was the tempeh crisps that totally put this recipe over the edge of deliciousness! Fix these burgers up with the toppings of your choice and on a whole wheat bun and you're all set! We also made the OMG Onion Rings from Appetite for Reduction to go along with them!

All the Toppings
 Black Bean Burgers:
  •  3 cups cooked black beans
  • 2 cups cooked brown rice
  • 1 cup bread crumbs (we used probably 1 1/2 to 2 cups of Panko bread crumbs)
  • ½ tsp. salt
  • ½ tsp. black pepper
  • ¼ cup chopped scallions
  • 1 Tbs. chili powder
  • 1 Tbs. ketchup
  • ½ to ¾ cup water, or as needed to process
Tempeh Strips:
  • 12 oz. tempeh, sliced into thin strips
  • 2 Tbs. chili powder
  • ½ tsp. pepper
  1. Preheat oven to 375F. Spray sheet pan with nonstick cooking spray.
  2. To make Black Bean Burgers: Combine black beans, brown rice, bread crumbs, salt, pepper, scallions, chili powder and catsup in food processor, and process, adding just enough water to blend, until smooth. Form into 6 equal-sized patties, and chill 1 hour.
  3. Meanwhile, to make Tempeh Crisps: Toss tempeh strips with chili powder, salt and pepper. Spread strips evenly on sheet pan, and bake about 15 minutes, or until browned and crisp. Remove from oven, and set aside.
  4. Heat skillet over medium heat, and spray with nonstick cooking spray. Add patties, cooking 5 minutes on each side, or until heated through. Place each burger on whole wheat bun. Garnish with crisps and favorite condiments.

Thursday, April 18, 2013

Sesame Soy Soba Stir Fry


Oh, the veggie stir fry. It is one of my go-to meals because it's easy to make, it has loads of veggies, plus it's fairly versatile. Choose your base - do you feel like brown rice, quinoa, couscous, pasta, or soba noodles? Then, the veggies - which ones do I have in the fridge that I'd like to use up? And then the sauce - how about a sesame/soy/ginger, peanut sauce, teriyaki sauce, sweet chili sauce, or coconut curry? Then, you can choose to add a protein of your choice - marinated tofu, tempeh, seitan, or even mushrooms. You can even add peanuts, cashews, pumpkin seeds...the possibilities are endless.  Now, I find myself whipping up various stir fry creations on my own without recipes in the kitchen. This is one of those recipes where you can alter it to your liking!


Here's a quick stir fry that uses soba noodles (Japanese buckwheat noodles that you can find at most grocery stores), a ton of different veggies, a sesame soy sauce, and topped with green onions and sesame seeds. The most laborious part of preparing the meal was chopping all the veggies and even then, it doesn't take too long. It also uses a lot of alliteration - sesame, soy, soba, stir fry!

You'll need:

1 package of soba noodles, cooked as per the instructions on the box

chopped veggies: broccoli, bok choy, green beans, red onion, red pepper, julienne carrots, garlic

Garnish:
green onions, sliced
sesame seeds

Sauce:
2 tbsp soy sauce
2 tbsp rice vinegar
1 tbsp sesame oil
1" ginger, minced
2 cloves garlic, minced
pinch red pepper flakes

Whisk all of the sauce ingredients together. Stir fry all of the veggies in the sauce for five minutes until softened. Don't overcook the veggies - they taste the best a little bit crunchy and fresh!

Serve the veggies and sauce over the noodles, and garnish with green onions and sesame seeds.

Tuesday, March 12, 2013

Black Bean and Mexi Rice Tacos


My friends, Sarah and Ryan, have recently become vegetarians, and they are making the switch to becoming fully vegan soon! Sarah was really missing eating her standard meaty-Mexican food - but fear not, there are so many delicious vegan Mexican food recipes out there! We decided to make these delicious tacos using a tomato-y Mexi-rice, a black bean/corn mixture, and an assortment of delicious toppings. Needless to say, it was a success, and I'm sure they will both be re-creating this meal together in the future! It was also really fun cooking with friends.


Once you make the rice and the filling, you can add any toppings that you'd like on top! We had chopped green onions, fresh cilantro, chopped cherry tomatoes, salsa, lettuce, hot sauce, and Daiya vegan cheese shreds out in little bowls. We used corn taco hard shells warmed in the oven for a few minutes, but you could use flour tortillas as well. These could also be made into larger burritos with bigger flour tortillas.

Mexican Rice
1/4 cup olive oil
2 cups long-grain brown rice, rinsed
1 medium onion, diced
6 cloves garlic, minced
1 jalapeno, minced
1/2 red pepper, diced
1-14oz can of diced tomatoes, or whole tomatoes pureed
1/4 cup fresh cilantro, chopped
3 1/2 cups vegetable broth
1 tbsp cumin
1 tbsp salt

1. Heat oil on medium heat in a large pot. Add the rice and stir constantly until it browns.
2. Add the onions and garlic, stir 2-3 minutes.
3. Add the peppers, stir 2-3 minutes.
4. Add the tomatoes, and stir another 2-3 minutes.
5. Add the broth, cilantro, cumin, and salt. Reduce to medium-low, cover and cook until the rice has finished cooking and most of the liquid is absorbed. This can take anywhere between 45 minutes and 1 hour.
6. Remove from heat and let the mixture sit with the lid on for 10 minutes.

Black Bean and Corn Taco Filling
1-15oz can black beans, drained and rinsed
1/2 bag of frozen corn
1 medium onion, diced
1/2 red pepper, diced
1 jalapeno, minced
1/4 cup fresh cilantro, chopped
1 tbsp cumin
1 tbsp chili powder
1/2 tsp cayenne
1 tsp garlic powder
1/2 tsp salt
1-2 tbsp olive oil

Mix everything together in a medium pot and place over medium-low heat. Stir until everything is cooked through and hot, about 10 minutes.

Sunday, February 17, 2013

Smoked Tofu with BBQ Sauce Wrap


This dinner was definitely a culmination of what was in the fridge at the time. Thankfully, it was super tasty and will be one to make over and over again! It is really hard to tell from the pictures what is inside the wrap. It is smoked tofu cooked in BBQ sauce, sauteed veggies, and a Vegenaise-sriracha mixture as an additional dressing.

This dinner is a great way to use up those extra veggies in the fridge! Plus, it is satisfying and delicious. And you don't need to many fancy ingredients. You can substitute regular tofu instead of smoked tofu (although I do recommend the smoked tofu!), or you can use tempeh or Gardein chik'n strips. Pick your protein!


Ingredients:

1 package of smoked tofu, cut into strips
oil for frying (I used grapeseed oil)
BBQ sauce (I used half a bottle of maple chipotle BBQ sauce)

1/2 onion, into slices
1 baby bok choy, chopped
1/2 yellow pepper, into slices
3 cloves garlic, chopped
handful of shiitake mushrooms, sliced

tablespoons of Vegenaise, with 1 tsp of sriracha mixed in, to taste for spiciness

Directions:

Heat a frying pan with some oil on medium heat and saute the strips of smoked tofu, until browned on both sides. At the same time, heat a separate pan with some oil and saute up all of the veggies.

When the tofu is browned, add the BBQ sauce to the pan. Reduce the heat to low. Let the tofu marinate in the sauce, flipping the strips over when necessary, 5 minutes. Spoon the BBQ sauce over top of the tofu after flipping.

Assemble the wrap - put a few slices of tofu in, then your sauteed veggies, and then a bit of the sriracha-vegan mayonnaise mixture.  Serve and enjoy!


Friday, February 15, 2013

Black Pepper Tofu


I regularly get emails and newsletters from VegNews - I highly recommend joining their email list since you'll receive all kinds of recipes, the latest news about vegan products, and articles regarding all things vegetarian! This recipe showed up in my inbox one day and I ended up making it that night! I've been looking for new tofu recipes aside from my usual stir fries and this one was very appealing. It originally appeared in a fantastic vegan recipe blog called Thursdays with Wanda.


If I had to make this dish again, I would definitely use way less black pepper. Now, I'm a girl who loves her meals spicy, but I did find this to be a bit too much for me to handle. I would reduce the amount of black peppercorns to one tbsp instead of three. I also used half of a red onion in place of the shallots, and a bunch of green onions in place of the leeks. I used only 2 tbsp of soy sauce and a little bit more ginger than the original recipe as well. I put the tofu over top of steamed broccoli and bok choy, as well as brown rice. Here is a link to the original recipe, but I will post my modifications below. All in all, it was a very easy recipe to make that would work great after a long day at work. It is very filling and nutritious!


Ingredients:
1 package firm tofu
1 tablespoon fresh black peppercorns
1 teaspoon red pepper flakes
5 cloves garlic, minced
1/4 cup olive oil
2 tablespoons soy sauce
1 teaspoon brown sugar
1 teaspoon rice vinegar
1" fresh ginger, minced
1/2 red onion, minced
1 bunch green onions, cut into 1" sections

Directions:
1. Cut the tofu into small blocks and let them drain on paper towels for 15 minutes.
2. Make the sauce: Crush up the black peppercorns into coarse flecks with your mortar and pestle (or in a spice grinder), then mix in the red pepper flakes, minced garlic, olive oil, soy sauce,brown sugar, and rice vinegar.
3. In a pan over medium high heat, swirl in some oil and then sear the tofu in batches until all sides are crispy, or about 2 minutes per side.
4. Add the ginger and onion to the tofu and saute for 2 more minutes. Add the sauce and the green onions. Cook for 5 more minutes. Add more soy sauce to taste.
5. Serve over some brown rice, and steamed veggies (I used bok choy and broccoli).

Tuesday, February 5, 2013

Vegan Gyoza and a Japanese-Themed Dinner


It all started with a trip across the border to Trader Joe's. We don't have any Trader Joe's stores in Canada, or any just across the border from Southern Ontario/Toronto area. The closest store is in Rochester, New York, so sometimes a road trip is in store and so is a fun grocery shopping trip!

I went to Trader Joe's for the first time last summer when on a little vacation to Put-in-Bay, Ohio with one of my best friends. We stopped at a location in Cleveland and I came home with bags full of vegan snacks that were entirely different from what I could find at stores at home. This visit was similar to that time as I exited the store with Vanilla Jo Jo's, Onion Ring chips, Roasted Coconut Chips, an assortment of various Clif bars, and all kinds of other goodies. Amongst those goodies was this bottle of Trader Ming's Gyoza Dipping sauce. With the inspiration of using this sauce for dinner, I decided to attempt to make vegan gyozas from scratch. A gyoza is an Asian dumpling filled with all sorts of sauteed veggies.

What started with an idea of making vegan gyoza resulted in tonight's dinner: a full-out Japanese buffet of gyozas, sushi, and soba noodles! It was a bit time consuming and resulted in a lot of dirty pots and pans...but it was incredibly delicious and well worth the work!

Vegan Gyoza!
Since I was unable to find wonton wrappers without egg in them (you might be able to find these at an Asian grocery store), I opted to make mine from scratch. I used this recipe from VegWeb and it turned out great. I also used this recipe for the filling. You will need a LOT of elbow grease when you're kneading the dough (unless you have a dough-kneading attachment for your stand mixer or a bread maker!), and you will also need a lot of elbow grease for rolling out the dough. The dough is very firm and difficult to roll out, but try your best. I was able to come out with about 12 three inch squares, along with some leftover dough. You should be able to get at least 16 squares, depending on how strong you are!

Vegan Wonton Wrappers

2 cups all-purpose flour
1/2 tsp salt
1/2 cup warm water

1.  Sift together the flour and salt in a bowl. Slowly stir in the warm water. The dough will be very stiff.
2.  Knead the dough on a floured surface until smooth, about 15 minutes. Put the dough back into the bowl and cover it with a towel. Let the dough stand for about 20 minutes.
3.  Roll out half of the dough as thin as you can. Cut into 3" squares using a pizza cutter or knife. Repeat for the other half of the dough. You can also use this recipe to make spring rolls, just cut the dough into bigger squares.

Vegan Gyoza

2 tbsp oil, divided
1/3 cup carrots, finely chopped
3-4 cloves garlic, finely minced
1/3 cup celery, finely chopped
1 tbsp sesame oil
1/2 cup shiitake mushrooms, finely chopped1-2" piece ginger, peeled and finely chopped
red pepper flakes, to taste
black pepper, to taste
1/4 cup green onions, finely chopped
2 tbsp tamari
wonton wrappers (store-bought or from recipe posted above)
2-6 tbsp water, for steaming

1.  To prepare the filling: Over medium-high heat, add 1 tbsp of oil to a hot skillet. Once the oil is hot, drop in the carrots and garlic and cook for 4 minutes, stirring constantly. Add the celery and cook for 2 minutes, stirring constantly. Next, toss in the sesame oil, mushrooms, cabbage, ginger, black pepper, and chili flakes and coat well with oil.
2.  Cook this mixture for another 2 minutes, then add in the green onions. Stir in 2 tbsp tamari. Once all of the veggies are soft, transfer to a bowl and allow to cool for 10 minutes.
3.  Please a tsp of filling in the center of each wonton wrapper. Moisten the edges with a little bif ot water, fold over, and crimp the edges to seal.
4.  To cook: Add 1 tbsp of oil and heat over medium-high. Drop in your dumplings and cook for 2-3 minutes per side until lightly browned. When both sides are lightly browned, add in 2-3 tbsp of water and cover with a lid. Turn the heat down to medium and allow the water to completely evaporate.

*** Please note *** These are the instructions for the original recipe. I found that adding water to a hot pot with oil in it was a little bit too dangerous for me. I recommend steaming the gyozas by using a separate steaming pot over a pot of boiling water.

5.  Gyozas are done when they are entirely translucent. If there are still opaque parts,  add more water, cover and cook. Flip them over if they get too brown on one side. You may have to repeat this process. If you're using a steaming pot, flip them as necessary.
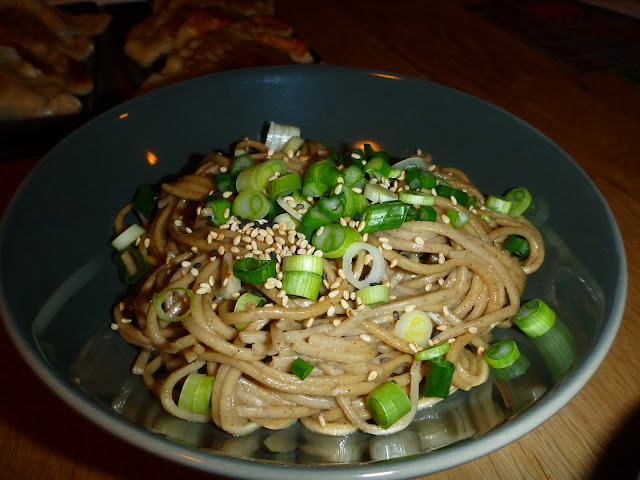
Sesame Soba Noodles with Green Onion

Soba noodles are a healthy buckwheat noodle used in Japanese cuisine. You should be able to find them at most grocery stores. Cook the noodles according to the directions on the package. Drain the noodles, then add them back to the pot along with some sesame oil and soy sauce. Heat through and serve. Top with chopped green onions and toasted sesame seeds.

I actually ended up adding some of the Trader Joe's Gyoza sauce to the noodles and it was absolutely delicious! It added a nice kick of ginger and more sesame flavour. Yum!

Veggie Sushi!
Making veggie sushi is not as hard as it looks! All you'll need is sushi rice, veggies to put inside (cucumber and orange/yellow pepper), and nori (seaweed) papers to wrap everything up. You can also put some toasted sesame seeds inside.

Cook the sushi rice according to the directions on the package. Using 1 cup of uncooked sushi rice will make you more than enough rice to make sushi. Once the rice is cooked, put it into a bowl and add 2 1/2 tbsp of seasoned rice vinegar and 1/2 tbsp of sugar.  Let the rice cool down.

On your nori sheet, lay out a row of sushi rice, and then your cucumber and pepper slices. Add some toasted sesame seeds. Then, put a little bit of rice vinegar along the top edge (where you have put your rice and toppings down) in order to allow it to stick together when you roll it all up. You can use those fancy tatami mats to roll up the sushi, or you can just use plastic wrap. Roll up the sushi. Then, you can cut it into 8 bite-sized pieces.

There are tons of books and websites about making sushi. I have a great book called Vegetarian Sushi that outlines the basics of making sushi and includes tons of different recipes for many veggie rolls.


And there you have it - a dinner that can rival any that you would find at a Japanese restaurant, and one that definitely has no meat or fish in sight!

Monday, January 28, 2013

Chipotle Lentil Burgers and OMG Onion Rings!


I have owned the Appetite for Reduction cookbook for at least a year and I just never got around to making anything from it! That might sound pretty crazy as there are so many awesome looking recipes in it. I do tend to collect vegan cookbooks and then I find all kinds of amazing recipes online that I end up trying...and then I forget about the cookbooks I own! Well, I am very impressed these two recipes out of Appetite for Reduction - the Lentil Chipotle Burger and the OMG Onion Rings! The burgers are healthy, tasty, and all sorts of spicy. The onion rings are baked, not fried, and totally crispy!


The only substitutions that I made included using Panko bread crumbs in place of the whole wheat bread crumbs that the recipes call for. I couldn't find whole wheat bread crumbs at the grocery store, and the regular bread crumbs contained all sorts of icky ingredients...including milk! So, I went with the Panko bread crumbs that are vegan. They worked wonderfully for the onion rings in place of regular bread crumbs. For the burgers, I ended up adding more bread crumbs than the recipe called for because the burgers weren't quite sticking together at first. This is likely because the Panko bread crumbs are airy and lighter than regular ones. Adding more Panko crumbs definitely solved the problem as I was able to form the lentil burgers into patties without any issues.

Also, I would definitely omit the salt next time I make the onion rings. They ended up being a bit too salty. Otherwise, they are super delicious and crunchy.  Here are the recipes!

Lentil Chipotle Burgers (Makes 6):

1 teaspoon olive oil
1 small red onion, cut into medium dice
1/2 pound zucchini, halved lengthwise and sliced 1/2 inch thick
3 cloves garlic, minced
1 cup lightly packed fresh cilantro, chopped (stems and leaves)
1 (15 ounce) can cooked lentils, drained and rinsed (1 1/4 cups)
1 cup bread crumbs
1/4 cup chipotles, seeds removed, with adobe sauce
2 tablespoons soy sauce
2 teaspoons red vinegar
1/4 teaspoon salt
2 teaspoons smoked paprika

Preheat a large pan over medium-high heat and add the olive oil. Saute the onion for about 3 minutes. Add the zucchini, garlic, cilantro, and a pinch of salt, and saute for 7 to 10 minutes, until the zucchini is soft.

Transfer the zucchini mixture to a food processor. Add all the other ingredients except for 1/2 cup bread crumbs. Pulse until mostly smooth, but there should still be a little texture. Transfer to a large mixing bowl.

Preheat the pan (the same one you already used to saute in is fine) over medium heat. Add the remaining 1/2 cup of bread crumbs to the burger mixture and use a fork to thoroughly combine.
Divide the burger mixture into six equal pieces.

Form the burger portions into patties and cook for about 12 minutes, flipping the burgers often, until they are nicely browned on both sides. Add more olive oil as necessary. Do three at a time for best results.

OMG Onion Rings:

2 vidalia onions (about a pound), or other sweet onion
1/2 cup plus 2 tablespoons all purpose flour
2 tablespoons corn starch
1 cup cold soy milk
1 teaspoon apple cider vinegar
1 cup whole wheat bread crumbs
1 teaspoon kosher salt
2 teaspoons olive oil

Slice onions into 3/4 inch thick rings. Separate the rings and place in a bowl.

Preheat oven to 450 F. Line a rimmed 12×18 baking sheet with parchment paper and set aside.

Now you’ll need two bowls for batter and breading. In one bowl, dump in the flour and cornstarch. Add about half of the almond milk and stir vigorously with a fork to dissolve. Add the rest of the almond milk and the apple cider vinegar, and stir to incorporate. Set aside.

In the other bowl, mix together the bread crumbs and salt. Drizzle in the oil and use your fingertips to mix it up well.

Get a conveyor belt going. From left to right, have the onions, the flour mixture, the breadcrumbs mixture and lastly the baking sheet. Dip each onion slice into the the flour, letting the excess drip off. Transfer to the breadcrumbs bowl and use the other hand to sprinkle a handful of breadcrumbs over the onion, to coat completely. This may take a bit of practice. Carefully transfer each onion to a single layer on the baking sheet. Make sure you use one hand for the wet batter and the other for the dry batter, or you’ll end up with club hand.

Spray rings lightly with cooking spray and bake for 8 minutes. Flip, and bake another 6 minutes. Rings should be varying shades of brown and crisp.

Friday, January 18, 2013

Baked Falafel and Hummus


I made this over the summer but didn't get around to posting about it until now! I was sorting through some old photos and remembered....hey, those falafels! That hummus! That was a delicious meal. I will definitely have to make this again sometime soon.

There are some vegan falafel balls that I'm able to buy at my local grocery store, but these ones blow them right out of the water. Plus, they are baked, making them healthier than other fried versions out there. (Feel free to fry these up if you'd prefer, of course!)

Baked Falafels (recipe originally posted on Epicurious):

1 cup dried chickpeas (2 1/2 cups cooked)
1/2 large onion, roughly chopped (1 cup)
2 tbsp finely chopped fresh parsley
2 tbsp finely chopped fresh cilantro
1 tsp salt
1/2-1 tsp red pepper flakes
4 cloves of garlic
1 tsp cumin
1 tsp baking powder
4-6 tbsp flour

1.  Soak the chickpeas for 8 hours or overnight.
2.  Drain the chickpeas well, and put into the food processor with onion, parsley, cilantro, salt, garlic, and cumin. Pulse the mixture until well chopped and blended, but not pureed. Sprinkle in the baking powder and flour; pulse. If the chickpea mixture doesn't stick together, you might need to add more flour.
3.  Move the mixture to a bowl with a lid and chill for several hours or overnight.
4.  Form patties out of the mixture and bake at 400 degrees F, turning once, until lightly browned on both sides (22-26 minutes).


What would a falafel  be without hummus! I made a small salad with baked falafels and hummus on the side to dip the falafels in, or to mix with the salad. Or, you could take the greens, falafels and hummus and put it into a wrap or pita bread.

The hummus recipe I used is from the amazing cookbook, Veganomicon (a must-own for anyone interested in healthy cooking!). At the time that I made this hummus, I had lots of fresh herbs growing in my garden. I added some fresh Zaa'tar leaves in this mixture, since it can be used sprinkled on the top of hummus. It was my first time ever growing zaa'tar and I hadn't even really heard of it until I bought it! It is a wild type of oregano that grows in Israel. It has a flavor similar to oregano, thyme, and marjoram.


Hummus (from Veganomicon):

2-15 oz cans of chickpeas, drained and rinsed (or 3 cups of soaked chickpeas from dried)
1/3 cup olive oil
1/4 cup lemon juice
3 tbsp sesame tahini
3 cloves garlic (or 1 head roasted garlic)
1/4 cup water (more or less for desired thickness)
ground cumin, coriander, and paprika, to taste
salt and pepper, to taste

Mix everything together in the food processor except for the water. Slowly add the water to the desired consistency.

I sprinkled zaa'tar and smoked paprika on top of the whole mixture! Yummmmm!

Thursday, January 10, 2013

Pineapple and Sweet Chili Stir Fry


Paul had the idea for this dinner from an episode of Chopped that he saw on Food Network. The idea was to take a sweet chili stir fry that we make on a regular basis and to add pineapple for a sweet and sour taste. The pineapple really does add a whole other dimension to the dish! I wouldn't have thought of adding a sweet tropical fruit to our stir fried vegetable meal like this, but it really does taste great!

We used the Mae Ploy sweet chili sauce, as I blogged about in the past for another stir fry post. Instead of using tempeh or tofu like we usually do, we used Gardein chick'n strips for the protein.

To make this meal, I cooked up some brown rice for the base. Then, I fried up the vegan chick'n strips in some grapeseed oil until they were lightly browned. Then, I added a whole bunch of vegetables (red pepper, onion, green beans, sprouts) and small cubes of pineapple. Add the Mae Ploy sweet chili sauce on top and fry it all up together.

Serve the veggie mix over the brown rice and you're done!

Friday, January 4, 2013

Perogies for Christmas Dinner


For Christmas dinner this year, we decided that it would be a real treat to make perogies from scratch! I have fond childhood memories preparing perogies with my family near the holidays. Half of my family heritage is Ukranian (the other half is Scottish!), so eating perogies around Christmastime was a family tradition. We would make large batches and it would take all afternoon to make them! This Christmas was my first time making them in my own kitchen. It did end up taking all afternoon to make the perogies (and the pasta that we made), but it was definitely worth it. We also ended up having several batches to freeze for future lunches and dinners.

We also baked this pasta for Christmas dinner - Tofu Baked Pasta - it was a favorite from when we first made it and it went perfectly with the perogies. This was definitely a warm and hearty holiday meal!

The recipe for the perogies came from the Post Punk Kitchen website. I followed the recipe exactly, except I didn't make the caramelized onions that were suggested. Instead, we decided to go with our own sauteed spicy onions and mushrooms to put on top.

We also didn't fry them after boiling them, we just served them boiled as a healthier option. You are welcome to fry them up after boiling them for a crispier fried taste!

We doubled this recipe to make approximately 60 perogies - the recipe below makes 30 perogies.


For the Dough:
3 Tablespoons canola oil
1 cup warm water
3 cups all purpose flour (plus a little extra for sprinkling)
3/4 teaspoon salt

Filling:
1 1/2 lbs yukon gold potatoes, peeled and sliced, cut into 3/4 inch chunks
1/4 cup canola oil
1 small onion, finely chopped
1/2 teaspoon pepper
1/2 teaspoons salt
 
Make the filling:
In a medium sized pot, cover potatoes in water. Place a lid on the pot and bring to a boil. Once boiling, lower heat to simmer and cook for about 15 more minutes or until potatoes are easily pierced with a fork.

Meanwhile, in a large pan, sautée the onions in oil over medium heat for about 7 minutes. Turn the heat off but stir occasionally even when the heat is turned off because they could still burn from the hot pan. When the potatoes are done boiling, drain them well and add them to the pan with the onions. Just mashed them right in there with a potato masher, that way you are sure to get all the flavor. Add the salt and pepper. Make sure potatoes are mashed well and fluffy. Set aside to cool a bit.

To make the dough:
Pour the water and oil into a large bowl. Add 2 cups of flour and the salt, keeping one cup aside. Use a fork to stir the flour in, and as it starts to come together, use your hands to knead until a loose dough forms (about 3 minutes.)

Sprinkle your counter with flour, then turn the dough out onto it and knead. Add the reserved cup of flour a little bit at a time, working it into the dough, until it is very smooth and elastic, about 10 minutes. If it’s too sticky, you can add a little bit more flour and knead it in, sometimes up to 1/4 cup extra. Conversely, if you get a good- feeling, smooth, elastic dough that isn’t tacky with less less than the extra cup of flour, then that’s okay, too.

Now we roll the dough out, and also bring a salted pot of water to boil to cook the perogies.

Divide the dough in half and make sure your counter is clean and sprinkled with a dusting of flour to prevent sticking. Roll half the dough out to about 1/16 of an inch thick, which is to say, very thin but not see through. Sprinkle the top with a light dusting of flour.

To make the circles: I use the top of a glass that is 3 1/2 inches, but somewhere between 3 1/2 and 4 inches is perfect. Have ready a lightly floured plate to place the finished circles on, and go ahead and firmly press your glass or cookie cutter into the dough, as close together as you can. Pull the excess dough up and set aside. Place circles on the floured plate. Combine the excess doughs and see if you can get a few more wrappers out of the deal.

Fill the dough with the filling: Make sure your pot of water is rapidly boiling. Have a small bowl of water for wetting the edges of the wrappers. Place about a tablespoon of filling into the center of a circle and dab water around the circumference of the circle. Fold the edges of the wrapper over filling and pinch in the middle to hold together. Pinch down the sides so that you have a sealed half moon. Don't stuff them too full or else the filling will come out of the edges.

Cook the perogies: Gently lower the perogies into a pot of boiling water. When they float they are ready. If for some reason they aren’t floating, it takes about 5 minutes for them to cook.

Make the topping: Slice an onion into thin slices and cut up some mushroom. Put a little bit of oil in a frying pan and let it heat up. Put the onion and the mushroom into the frying pan, and shake on some cayenne pepper (or other hot spice). Mix it all together and saute for 5-8 minutes, until the onions are soft and translucent.

Top the perogies with the spicy onions/mushrooms and you're done! You can also serve with vegan sour cream if you'd like!

This recipe turned out great and brought all of those great childhood memories back for me! I think it will become a new Christmas tradition of mine...and maybe other times of the year when I feel up to making them! It is always nice to have a quick go-to dinner ready in the freezer, especially something as yummy as perogies!

Thursday, November 29, 2012

Red Lentil and Roasted Tomato Pasta


This is one of my first attempts at making a tomato-based pasta sauce from scratch, and the lentils were a delicious and nutritious addition to the meal! This sauce does take a little bit of time as you have to wait for the tomatoes and peppers to roast in the oven, but it is well worth the wait. The recipe comes from The Naked Kitchen, but I have modified it slightly as I found it needed some more spices and flavor. I added some spices that you may typically find in a tomato sauce - basil, oregano, thyme and rosemary. I omitted the bay leaf and parsley that was originally found in the recipe. Feel free to use whatever spices you enjoy!


I used a whole box of whole grain macaroni pasta - feel free to use your favourite shape of noodle for this one. I found the amount of sauce perfectly covered all of the pasta.

3-4 cups cherry tomatoes
2 bell peppers (I used yellow ones), halved with stems and seeds removed
2 tbsp olive oil, divided
1/2 red onion, diced
5 cloves garlic, minced
1 tsp sea salt
1/2 tsp ground black pepper
1/4 cup red wine
1 cup red lentils
2 cups water
1/2 tsp each - basil, oregano, thyme, rosemary

1.  Preheat the oven to 350 degrees. Toss the tomatoes and peppers in 1 tbsp of olive oil. Place the on a baking sheet and roast in the oven for 30-40 minutes.

2. Place them in a food processor and blend for a minute.

3.  Saute the onion and garlic in remaining olive oil. Add salt and pepper and saute for one minutes longer.

4. Carefully add red wine and simmer for a couple more minutes.

5. Add the lentils, water, tomato mixture, and spices. Cover and reduce heat to low. Cook for 25 minutes or until lentils are soft and tender. Serve.

We also made this great side salad to serve with the pasta! It has dandelion greens, lettuce, radicchio, cucumber, onions, peppers, beets, and vegan croutons.


Tuesday, November 20, 2012

Quick Vegan Alfredo Pasta


This is one of those recipes that I tried a while back, had great success with, and totally forgot about. Well, this yummy pasta was resurrected tonight and it made for a great dinner! This quick and easy vegan Alfredo sauce is not only delicious, but filled with all sorts of good-for-you ingredients like cashews, nutritional yeast, tahini and soy milk.

I used the recipe from the Vegan Yum Yum blog, and the recipe can also be found in the Vegan Yum Yum cookbook! I added steamed broccoli and orange pepper to the pasta for even more yumminess/nutritious veggie action!

The whole sauce recipe is made by throwing all of the ingredients into a blender or food processor, and then adding it to the cooked pasta. Super easy.

1 cup soymilk
1/3 cup raw, unsalted cashews
1/4 cup nutritional yeast
3 tbsp tamari or soy sauce
2 tbsp Earth Balance margarine
1 tbsp Tahini
1 tsp fresh lemon juice
2 tsp Dijon mustard
1/2 tsp smoked paprika
1 pinch nutmeg
4 cloves of garlic
Black pepper, to taste

Once you blend everything together, add it to the drained cooked pasta in the same pot, and heat it all together on medium heat. Add the steamed broccoli and orange/red/yellow pepper if you choose to do so. Stir until heated through and serve.