Monday, October 21, 2013

Ooey Gooey Vegan Mac N Cheeze


Ever since I tasted the super delicious Mac N Cheeze at Kindfood in Burlington, ON, I have wanted to emulate this same dish at home. I think I've come pretty close here, and even though it isn't identical, it was definitely a success! While the one at Kindfood is completely gluten-free, I chose to use some regular wheat flour in this recipe, though I did pick out some brown rice noodles to try.  The recipe that I found online that seemed most like the one I tried at the restaurant was from Vegan Yum Yum, although I did modify the recipe a little bit.

Ingredients:
1/3 cup Earth Balance
1/4 cup all purpose flour
2 1/2 tbsp tamari
1 tbsp lemon juice, fresh
1 tbsp sweet/white miso
1 tbsp tahini
1 tbsp tomato paste
1 tsp paprika
1 tsp Dijon mustard
1 1/4 cup soy milk (or other non-dairy milk)
1/3 cup nutritional yeast
salt and black pepper, to taste

Heat the saucepan and add the Earth Balance. Once it is melted, add the flour and whisk constantly until a paste forms. Don't let your pot get too hot. Add tamari, lemon, miso, tomato paste, paprika, Dijon, and whisk. Slowly pour in the soy milk, whisking constantly. Add the nutritional yeast and mix. Cook until it thickens up for about 5 minutes. Add salt and pepper.

Cook a package of macaroni or other shaped pasta, and toss with the sauce. Top with Daiya cheddar cheese and whole grain bread crumbs. Bake at 400 degrees for 20-25 minutes.


Sunday, October 20, 2013

Double Chocolate Super Fudgy Cookies


Last night, I had an urge to bake cookies. So...I did! I looked through some recipes that I had written down and hadn't tried yet. It was also very important that I had all of the ingredients already on hand as I really didn't feel like going out to the store. So here they are, double chocolate super fudgy cookies! They are super chocolatey, soft and moist. I feel like I really didn't need to add as many chocolate chips as I did, so feel free to modify to what suits you. Also, be sure to use a good quality cocoa powder (I use the one by Cocoa Camino) as a higher quality cocoa will make your cookies taste better!

Now, my oven is quite small and on my first batch of cookies with one tray on top and one on the bottom, the bottom ones burnt. The ones on the top rack turned out great. So, you might want to check on these about 6-8 minutes through cooking to see how they're doing. When I baked the second batch on the top rack, I cooked them for 8 minutes and they cooked perfectly. With that said, I'm sure they would cook great for the time recommended in the recipe (10 minutes) in other ovens.

Ingredients:
1/2 cup oil
2 cups sugar
2 tsp vanilla
1 tbsp + 1 tsp whole flax seeds
1/2 cup soymilk
2 cups whole wheat pastry flour
3/4 cup Dutch processed cocoa powder
1 tsp baking soda
1/2 tsp salt
1 1/2 cups vegan chocolate chips

Preheat the oven to 350. Grind flax seeds until they become a powder. Add the soymilk to them and mix with a fork for 30 seconds. Set aside.

In a large bowl, sift the flour, cocoa, baking soda and salt.

In a separate bowl, blend the oil and sugar with a mixer. Add the flax/soy mixture and mix well. Add the vanilla.

Fold in the dry ingredients in batches. When the mixture becomes too stiff to stir, you can use your hands until a stiff dough forms. Add the chocolate chips and mix with your hands.

Roll the dough into 1" balls and flatten into a disk. Place on a parchment paper lined cookie sheet, about 1" apart.

Bake for 10 minutes. Let cool for 5 minutes, and then set on a wire rack to cool completely.

This recipe made about 36 cookies!


Thursday, October 17, 2013

A Very Vegan Thanksgiving! Chickpea Cutlets, Mashed Potatoes, Mushroom Gravy, and Roasted Broccoli!


It was Canadian Thanksgiving this past Monday, so we went all out with a hearty traditional meal...vegan-style, of course! Justin and I were in the kitchen for a good while and made this delicious meal together. It was one of those times where all of the pots and burners were used on the stove top and so many dishes piled up in the kitchen sink. But, it was well worth the time (and the mess!). I chose dishes from Isa's holiday recipes over at Post Punk Kitchen because they always turn out so great! We went with Doublebatch Chickpea Cutlets, Fluffy Mashed Potatoes, Savory Mushroom Gravy, Roasted Broccoli & Asparagus, and the Cosmos Apple Pie from the Vegan Pie in the Sky cookbook.


I didn't fully follow the recipe for the broccoli - first of all, we added asparagus, too. Next, we added some fresh and dried herbs and spices as I would typically use for roasted vegetables. We roasted the vegetables in olive oil, along with the herbs, on a baking sheet as per the recipe.


The pie was baked to perfection and was super delicious! For an added amount of yum, I sprinkled some maple sugar on top in place of regular sugar, along with the cinnamon.

And another thing to be thankful for? This was way too much food for only two people! So, we had lots of leftovers to eat. The chickpea cutlets went pretty fast, but we ended up with such a huge amount of mushroom gravy that I'm thinking of making more cutlets and potatoes just to use up the gravy! It is Thursday now and I've still got some leftover potatoes, mushroom gravy, and pie. For the last couple of days, I've had some pretty fantastic lunches at work! Happy Thanksgiving to my fellow Canadians, and Early Happy Thanksgiving to my American readers!

Saturday, September 28, 2013

Make Your Own Hot Sauce from Scratch!


With the abundance of hot peppers in the potted veggie garden that I've had growing this summer, I was trying to figure out ways to use them all before they went bad. I use them regularly in stir fries, pasta sauces, and salsa, but I still had so many peppers! I decided to try my hand at making my own hot sauce and it was a spicy success! After scouring the web for various hot sauce recipes, I decided to go with one that seemed relatively easy to make and one that included ingredients that I already had on hand. Plus, this one included a bit of chipotle, which is always good!

I used the recipe from Veg Obsession with the peppers that I had in the garden. You could really use any type of hot pepper - some will be hotter than others. I used a combination of Cayenne Peppers and Five Colour Chinese Hot Peppers - maybe between 30 and 40 in total, since the Five Colour peppers are smaller in size.

Ingredients:
24 hot peppers, any variety
1/3 cup onion
1 bulb garlic
1 carrot
2 tbsp dried chipotle pepper
1/2 tsp salt
white vinegar
apple cider vinegar

Directions:
Slice off the tops of the peppers. Peel the onion and the garlic cloves. Chop the onion and carrot into big chunks. Throw everything into a large pot. Cover almost entirely with a mixture of white vinegar and apple cider vinegar (about 95% white vinegar and 5% white vinegar). Simmer the mixture on low-medium for 10-15 minutes.

* Note - the hot peppers caused some spicy fumes to rise up out of the pot...and they seemed to fill the entire kitchen and living room, too! It actually made me cough. So, I would recommend some sort of ventilation if you're using really hot pepper...once I opened the window, everything was fine!

Remove the veggies and place in a blender with a little bit of the vinegar in which they were cooked. Blend until smooth.

Pour the blended veggie mixture into a saucepan. Add the vinegar that they were cooked in before little by little until it reaches the desired consistency. I ended up using all of the vinegar in the hot sauce. Add the dried chipotle flakes and salt. Simmer and stir for a couple of minutes and pour into bottles.

This amount made two bottles of hot sauce and I'm storing them in the fridge. Put on everything and enjoy!

Thursday, September 12, 2013

Support Me in my Walk for Farm Animals (Farm Sanctuary Charity Walk)


Two years ago, I participated in the Walk for Farm Animals supporting Farm Sanctuary and I've decided to raise money for this amazing animal charity once again this year! I have joined the Toronto walk that happens on September 28th, 2013.  Ever since I visited Farm Sanctuary, I've been a huge supporter of this amazing organization and will do everything that I can to help them out. They are one of the leading animal charities that rescue farm animals that have been abused as a result of factory farming, and they also do a lot to change government policies regarding abusive practices towards animals.

I would really appreciate any donations if you would like to sponsor me in this event.  By clicking the above button, you will be taking directly to my fundraising page, where your donations will go directly to Farm Sanctuary.  Any donations are appreciated and the rescued farm animals will be thankful for your support!

It would also be fantastic if you wanted to participate in the event and raise some money as well for this worthwhile cause!  You can sign up as a participant in a city close to you, become a Virtual Walker in your city like I did, or "Sleep In For Farm Animals" where you'd like to raise money but might be a bit too busy to take part in a walk. 

Thank you so much for your support!

Friday, August 30, 2013

Caribbean Peas and Rice...with Kale!


I love the combination of beans and rice and this recipe was a great opportunity to make a new dish using those healthy ingredients. This one is reminiscent of past travels in the Caribbean and dining on local cuisine. Peas and rice are a staple there, and it just happens to also be vegan! This recipe is from Happy Herbivore and also uses an ingredient that's a fan-favorite...kale!

The recipe calls for jerk seasoning, which I did not have on hand. However, I had all of the spices required in order to make a jerk spice blend, so I was able to make it from scratch! I used this one from Allrecipes, minus the oil:

2 tbsp dried minced onion
2 1/2 tsp dried thyme
2 tsp ground allspice
2 tsp black pepper
1/2 tsp ground cinnamon
1/2 tsp cayenne pepper
1/2 tsp salt

Combine all of those ingredients together. Any extra seasoning that you don't use could be stored in a small jar for next time!

Here's the recipe - this one makes enough to serve 4, or you can save it for lunch the next day like I am if you're dining solo!

1 bunch scallions, white parts sliced thin
2 whole celery stalks, minced
4 whole garlic cloves, minced
2 tbsp fresh ginger root, minced
4 whole fresh thyme leaves
1½ tsp hot sauce
2 tbsp ketchup
¼ tsp turmeric
1 bunch kale, chopped into small pieces
15 ounces black-eyed peas, drained and rinsed
1 cup brown rice, uncooked
2½ cups vegetable broth
2 tsp Jamaican dried jerk seasoning (using recipe above)

Combine rice with 2 cups of vegetable broth in a large pot and set aside. Line a skillet with a thin layer of broth and add scallions, celery, garlic, ginger, thyme, hot sauce and 1 tsp jerk seasoning. Cook over high heat, adding additional broth as necessary, until the celery is soft, about 3 minutes. Add remaining jerk seasoning, stirring to coat. Transfer to rice, add 2 squirts of ketchup and turmeric, stirring to combine. Cover and bring to a boil. Once boiling reduce heat to low and simmer 40-50 minutes, until rice is cooked.  You might have to add more broth as the rice absorbs the liquid. Once rice is fully cooked, stir in black-eyed peas and greens. Let the greens wilt slightly. You can serve with hot sauce or add a little bit of salt, if needed.

Wednesday, July 24, 2013

Miso-Maple Sweet Potato Tacos


In my never ending search of delicious food and recipes to try online, I came across this one at The Kitchn that caught my interest. I'm always up for trying new Mexican-inspired recipes since some of my go-to meals include burritos, tacos, and eating as much re-fried beans and rice as I can. This one included one of my favorite foods, and one that I'm trying to eat more of since they're so good for you...sweet potatoes! Plus, the words...miso....maple syrup...sweet potatoes...really, how could you go wrong!


This recipe was delicious and perfect as it was - I didn't feel the need to alter any ingredients and the quantities were bang-on! It was pretty easy to make, especially since I bought my sweet potatoes pre-cut and pre-washed. I doubled the amounts of the miso-maple glaze since I think I had double the amount of sweet potatoes on hand, which truly shows since I have a lot left over. This would be fantastic re-heated for lunch tomorrow though, which I'll be doing!

Sweet Potatoes, fresh from the oven

Here's the recipe!

Glazed Sweet Potato Filling
2 tablespoons miso paste
2 tablespoons maple syrup
2 tablespoons rice wine vinegar
2 medium sweet potatoes, unpeeled and chopped into small cubes
1 small red onion, chopped
Olive oil

Toppings
whole wheat or corn tortillas, to put everything inside 
red pepper, chopped
green onions, chopped
hot pepper or jalapeno, chopped
cilantro 
toasted pepitas (pumpkin seeds)
sprouts or greens

Cilantro-Coconut Sauce
1/2 cup light coconut milk
1/4 cup cilantro leaves
1/4 cup basil leaves
1 scallion, green and white parts, chopped
1/4 cup toasted pepitas (pumpkin seeds)
1 lime, zested and juiced
1 small garlic clove
Splash of Sriracha hot sauce (optional)
Pinch of sugar (optional)
Salt and freshly-ground black pepper, to taste

Heat oven to 400°F. Whisk the miso paste, maple syrup, and vinegar together in a small bowl. Spread sweet potatoes and onions in a single layer on a baking sheet (you might need 2 baking sheets). Drizzle with a little olive oil, and then liberally brush the glaze over the vegetables.

Bake in a 400 degree oven for 20 to 30 minutes (it took me 40-45 minutes to get the potatoes soft since my sweet potato cubes were a bit larger). The time will vary depending on the heat of your oven and the size of your sweet potato cubes. The onions will likely be done first so be sure to watch and take them out when they're nicely browned but not burnt. When the sweet potatoes are finished, remove from the oven, taste and add another brushing of glaze if you wish.
Serve on warm corn tortillas with cilantro-coconut sauce (see below) and fixings such as avocado, sprouts, cilantro, and pepitas.
In a food processor, pulse all cilantro-coconut sauce ingredients together until just combined. Serve alongside the tacos.

Delicious Toppings!


Monday, May 20, 2013

Vegan Baked Tacos


From the photo above, it's hard to tell exactly what this meal is other than a mound of Daiya cheese, jalapenos, and salsa. It's a recipe called Baked Tacos from Vegetarian Times magazine (March 2003). I adapted this one a little bit to make it vegan, and also added a couple more ingredients that I enjoy (mostly the onions). This is a really easy recipe to make and quick to prepare - it is sure to be a new winner for dinner!


It also makes a LOT of food. Unless you have a family of four or more people, you'll probably have some leftovers. These re-heat really well and are really yummy the next day.

I'm not really sure "tacos" is the right word to describe these. They are more like baked Mexican wraps, smothered in salsa and cheese.

Ingredients:

8 - 8" flour tortillas
1 - 15oz can refried beans
1 package of baked tofu, cut into 16 long strips
1 jalapeno pepper, chopped
1/2 small red onion, chopped
Daiya cheddar shreds
chopped fresh coriander for garnish
chopped green onion for garnish
1 1/2 cups salsa

Directions:

1.  Preheat the oven to 450 degrees. Spray 9x13" baking dish or larger with non-stick cooking spray.
2.  Starting with 1 tortilla, spread half of the tortilla with 2 heaping tablespoons of beans, then 2 slices of tofu, 1 tbsp jalapeno, 1 tbsp red onion, 1 tbsp Daiya. Wrap tightly and place in the baking dish.
3.  Repeat with the rest. Arrange all in the baking dish. Pour salsa on top, sprinkle with Daiya. Cover the baking dish with foil.
4.  Bake for 20 minutes or until filling is heated through. Top the tacos with cilantro and green onions.

Sunday, April 28, 2013

Black Bean Burgers with Tempeh Crisps

Black Bean Burger with all the toppings!

The Post Punk Kitchen Top 100 for 2012 alerted me to the fact that archived editions of Vegetarian Times magazine are available to read for free via Google Books! BTW - if you haven't looked through the PPK Top 100 list, you should check it out for all kinds of wonderful vegan things that came out last year! Anyway, while looking through the old magazines, I came across this recipe for Black Bean Burgers with Tempeh Crisps that I decided to try! 

The recipe is also available over at their website, where I also discovered that they post all of the recipes from their magazines (also available for free!). Now, you have hundreds and hundreds of recipes to try out. Only a few of their recipes are vegan or can be made vegan, so watch out for those recipes that have dairy or eggs.

Tempeh Crisps
The black bean burgers were super yummy, but I thought it was the tempeh crisps that totally put this recipe over the edge of deliciousness! Fix these burgers up with the toppings of your choice and on a whole wheat bun and you're all set! We also made the OMG Onion Rings from Appetite for Reduction to go along with them!

All the Toppings
 Black Bean Burgers:
  •  3 cups cooked black beans
  • 2 cups cooked brown rice
  • 1 cup bread crumbs (we used probably 1 1/2 to 2 cups of Panko bread crumbs)
  • ½ tsp. salt
  • ½ tsp. black pepper
  • ¼ cup chopped scallions
  • 1 Tbs. chili powder
  • 1 Tbs. ketchup
  • ½ to ¾ cup water, or as needed to process
Tempeh Strips:
  • 12 oz. tempeh, sliced into thin strips
  • 2 Tbs. chili powder
  • ½ tsp. pepper
  1. Preheat oven to 375F. Spray sheet pan with nonstick cooking spray.
  2. To make Black Bean Burgers: Combine black beans, brown rice, bread crumbs, salt, pepper, scallions, chili powder and catsup in food processor, and process, adding just enough water to blend, until smooth. Form into 6 equal-sized patties, and chill 1 hour.
  3. Meanwhile, to make Tempeh Crisps: Toss tempeh strips with chili powder, salt and pepper. Spread strips evenly on sheet pan, and bake about 15 minutes, or until browned and crisp. Remove from oven, and set aside.
  4. Heat skillet over medium heat, and spray with nonstick cooking spray. Add patties, cooking 5 minutes on each side, or until heated through. Place each burger on whole wheat bun. Garnish with crisps and favorite condiments.

Thursday, April 18, 2013

Sesame Soy Soba Stir Fry


Oh, the veggie stir fry. It is one of my go-to meals because it's easy to make, it has loads of veggies, plus it's fairly versatile. Choose your base - do you feel like brown rice, quinoa, couscous, pasta, or soba noodles? Then, the veggies - which ones do I have in the fridge that I'd like to use up? And then the sauce - how about a sesame/soy/ginger, peanut sauce, teriyaki sauce, sweet chili sauce, or coconut curry? Then, you can choose to add a protein of your choice - marinated tofu, tempeh, seitan, or even mushrooms. You can even add peanuts, cashews, pumpkin seeds...the possibilities are endless.  Now, I find myself whipping up various stir fry creations on my own without recipes in the kitchen. This is one of those recipes where you can alter it to your liking!


Here's a quick stir fry that uses soba noodles (Japanese buckwheat noodles that you can find at most grocery stores), a ton of different veggies, a sesame soy sauce, and topped with green onions and sesame seeds. The most laborious part of preparing the meal was chopping all the veggies and even then, it doesn't take too long. It also uses a lot of alliteration - sesame, soy, soba, stir fry!

You'll need:

1 package of soba noodles, cooked as per the instructions on the box

chopped veggies: broccoli, bok choy, green beans, red onion, red pepper, julienne carrots, garlic

Garnish:
green onions, sliced
sesame seeds

Sauce:
2 tbsp soy sauce
2 tbsp rice vinegar
1 tbsp sesame oil
1" ginger, minced
2 cloves garlic, minced
pinch red pepper flakes

Whisk all of the sauce ingredients together. Stir fry all of the veggies in the sauce for five minutes until softened. Don't overcook the veggies - they taste the best a little bit crunchy and fresh!

Serve the veggies and sauce over the noodles, and garnish with green onions and sesame seeds.

Saturday, April 13, 2013

Air-Popped Popcorn with Yummy Vegan Toppings


When I was a kid, my family used to always make popcorn using the air popped popcorn machine. I have so many fond memories of curling up on the couch to watch a movie or TV along with my family, with a big bowl of buttery, salty, delicious popcorn. It had been a while since I'd enjoyed some freshly popped popcorn, aside from buying some of the bags of organic salted popcorn at Whole Foods. Finally, I splurged and bought myself a popcorn popper!


I purchased the air popper at Bed Bath and Beyond (using a 20% off coupon, too....woo!) and chose this one by Nostalgia Electrics. It is a bit different than the one I had as a kid, where you pour the kernels into the bottom of the popper and a narrow metal arm moves the kernels around (so they don't burn) until they begin to pop. It wasn't too expensive and it definitely does the job of making a fluffy, crunchy, delicious treat!

When it comes to toppings and making some dairy-free vegan popcorn, it's easy! If you're looking for that classic, buttery popcorn, just melt down some Earth Balance or other vegan margarine in the microwave, and pour it on top. You can also use olive oil on the popcorn. Using the Earth Balance, coconut oil or olive oil allows any other toppings you put on top to stick to the popcorn.  My favourite popcorn right now uses melted Earth Balance, spoonfuls of nutritional yeast (a great way to add a cheesy taste and get your vitamin B12!), Trader Joe's garlic salt grinder (garlic, onion, parsley, and sea salt), and dried dill. 

Here are some other ideas for popcorn toppings!

* Classic - melted Earth Balance and salt
* Noochy - melted Earth Balance, nutritional yeast, and salt
* Spicy - melted Earth Balance with sriracha and garlic powder mixed in, along with nutritional yeast
* Asian-inspired flavors - sesame oil with sriracha and a tiny bit of soy sauce
* Sweet - olive oil and cinnamon sugar on top
* Kettle Corn - olive oil, sugar, and salt

If you don't like the nutritional yeast or other toppings falling to the bottom of the popcorn bowl, you can mix some of them into your melted Earth Balance first! With popcorn, feel free to add any of the spices that you love....smoked paprika, cayenne, chili pepper, thyme, dill, garlic powder, onion powder, cumin, curry....the possibilities are endless!

Thursday, April 4, 2013

Speculoos (Cookie Butter) Cookies


For those of you who aren't familiar, Speculoos is a delicious cookie butter spread that is sold at Trader Joe's in the USA. It has the consistency of peanut butter, but it is made of crushed up cookies with a gingerbread taste. Since I'm from Canada, I bought a jar of it one time while in the States and found out that it is absolutely delicious on pancakes! I went to the States a second time and bought a jar of the then-new crunchy Speculoos. Now, I discovered that you can actually take the cookie butter spread, combine it with a few ingredients, and bake it back into cookies. This changes everything. Now, I'm almost out of Speculoos having baked this recipe a couple of times and have to go back to Trader Joe's to buy some more!


The recipe that I used is adapted from the one at Have Cake, Will Travel. I used a little bit less sugar the second time around and found that it tasted better. Feel free to use a full cup of sugar if you're looking for an even sweeter treat. These are really quick to make and you'll have homemade cookies in no time!

This should bake up 20-24 cookies.

2/3 cup Speculoos
3/4 cup sugar
1 tsp cinnamon
pinch salt
1 cup whole wheat pastry flour
1/2 tsp baking powder
6 tbsp soy milk

Preheat the oven to 350 degrees F. In a large bowl, combine the Speculoos, sugar, cinnamon and salt. Add the flour, baking powder, and soy milk. Put 1 tbsp of dough per cookie on a pan and bake 12-16 minutes.

Thursday, March 28, 2013

Homemade Vegan Cream Cheese from Cashews


Cream cheese on a bagel is definitely something that I miss since going vegan, and although there are a few different cheese-less cream cheeses out on the market, I find that many of them aren't that great. I am not a fan of the soy taste, so this recipe by the amazing Miyoko Schinner (author of Vegan Artisan Cheeses) looked easy enough to make and totally appealing - no soy involved in the process!

At first, I wasn't sure if I was a fan of this recipe. The cream cheese is made out of raw, soaked cashews and a bit of non-dairy yogurt (I used almond yogurt), which didn't taste like too much at first. After a few days, I realized that this spread tastes way better the longer it sits in the fridge! After a week, it tastes amazing. I did make a few alterations - added some garlic powder, onion powder, and some fresh chives. It tastes fantastic on a bagel and definitely fills that void of no longer eating real cream cheese!

Here's the recipe! I should also mention that this keeps up to two weeks in the fridge, or 4 months in the freezer if you don't think you'll use it up all at once.

2 cups raw cashews, soaked in water for 8 hours and drained
1/2 cup water
2 tablespoons non-dairy yogurt (I used almond yogurt)
1 pinch salt
optional ingredients to taste: onion powder, garlic powder, fresh chives

Put everything in a high-speed blender or food processor and process until smooth and creamy.

Transfer to a glass bowl, cover and allow to sit out at room temperature for 24-48 hours. (48 hours if using for a cheesecake.).

Cover and refrigerate.

Sunday, March 24, 2013

Chickpea and Rice Soup with Kale


Looking for a hearty, nutritious, comforting bowl of soup? Look no further! This one was originally posted over at the Post Punk Kitchen by the amazing Isa and it was another success in the kitchen (her recipes always turn out wonderfully!).  This soup is very healthy and satisfying with chickpeas, veggies, brown rice, kale, and a flavorful cashew cream is added to the broth. It is fairly quick to whip up as well and doesn't take too much preparation. In fact, I'm sure you have most of these ingredients in the kitchen already so you could make it...right now! It's also topped with green onions, which I love to devour.


Ingredients:

3/4 cup cashews, soaked in water for 2 hours or overnight
2 tablespoons olive oil
1 medium yellow onion, thinly sliced
3 cloves garlic, minced
1 teaspoon dried rosemary
3/4 teaspoon dried thyme
1 teaspoon salt
Fresh black pepper
3/4 cup rice, rinsed (I used parboiled brown rice - you'll want one that cooks in 15 minutes or under)
3 ribs celery, thinly sliced
1 cup carrots, diced chunky
5 cups vegetable broth
1 24 oz can chickpeas, drained and rinsed (about 3 cups)
4 cups chopped kale
Thinly sliced green onion, for garnish

Directions:

Drain the cashews and place them in a blender with one cup of fresh water. Blend until completely smooth, scraping the sides of the food processor with a spatula occasionally to make sure you get everything. This could 1 to 5 minutes depending on the strength of your blender.

Preheat a stock pot over medium heat. Saute onion in olive oil with a pinch of salt for about 5 minutes, until translucent. Add garlic, rosemary, thyme, salt and pepper and saute a minute more.
Add rice, celery and carrots and then pour in the broth. Cover and bring to a boil. Once boiling, bring down to a simmer, add the chickpeas, and let cook for about 15 more minutes, until rice is cooked and carrots are tender.

Add the cashew cream and kale, and simmer until kale is wilted, 3 to 5 more minutes. You may need to add water to thin the soup if it seems too thick. Taste for salt and seasonings and let sit for 10 minutes or so to allow the flavors to marry. Serve topped with green onions.

It thickens as it cools, so if you have leftovers, just thin with a little water when you reheat.

Saturday, March 16, 2013

Apple Cider Mini Muffins


Originally, these were meant to be mini donuts. But, after making the first batch as mini donuts, they tasted much more like muffins to me - most likely due to the use of whole wheat flour. So, the next batches were baked in a mini muffin pan instead and these cutie little muffins were baked (and eaten!).

These muffins are slightly more wholesome than your average ones, using ingredients like whole wheat flour and apple sauce. Maple syrup is used in place of some of the sugar. Another special ingredient that I had to buy was apple cider, but I was able to easily find that at the grocery store. The muffins turned out super moist and had that wonderful apple-cinnamon flavor.

For an added sweetness, these muffins are topped with cinnamon sugar. I actually found a cinnamon sugar grinder at Trader Joe's that worked perfectly! However, you can easily mix together equal parts of cinnamon and sugar and dip each muffin into the mixture.

Ingredients: (Makes 48 mini muffins)

1 cup whole wheat flour
1 tsp baking powder
3/4 tsp baking soda
1/4 tsp salt
1 tsp cinnamon
1/4 tsp nutmeg
1/3 cup sugar
1/4 cup maple syrup
1/4 cup unsweetened applesauce
1/4 cup apple cider
1 tbsp olive oil
2 tbsp soymilk
1/2 tsp apple cider vinegar

Directions:

1. In a medium bowl, whisk together the flour, baking powder, baking soda, salt, cinnamon and nutmeg.
2. In a separate bowl, whisk the sugar, maple syrup, apple sauce, apple cider, oil, soymilk, and vinegar.
3. Slowly add the dry ingredients to the wet ingredients. Mix but don't overmix.
4. Pour into the mini muffin tin (or mini donut tin, if you'd rather make donuts!). Bake at 350 degrees for 12 minutes.
5. Let cool completely in a pan. Mix equal parts of cinnamon and sugar, and dip each muffin top into the mixture.

Tuesday, March 12, 2013

Black Bean and Mexi Rice Tacos


My friends, Sarah and Ryan, have recently become vegetarians, and they are making the switch to becoming fully vegan soon! Sarah was really missing eating her standard meaty-Mexican food - but fear not, there are so many delicious vegan Mexican food recipes out there! We decided to make these delicious tacos using a tomato-y Mexi-rice, a black bean/corn mixture, and an assortment of delicious toppings. Needless to say, it was a success, and I'm sure they will both be re-creating this meal together in the future! It was also really fun cooking with friends.


Once you make the rice and the filling, you can add any toppings that you'd like on top! We had chopped green onions, fresh cilantro, chopped cherry tomatoes, salsa, lettuce, hot sauce, and Daiya vegan cheese shreds out in little bowls. We used corn taco hard shells warmed in the oven for a few minutes, but you could use flour tortillas as well. These could also be made into larger burritos with bigger flour tortillas.

Mexican Rice
1/4 cup olive oil
2 cups long-grain brown rice, rinsed
1 medium onion, diced
6 cloves garlic, minced
1 jalapeno, minced
1/2 red pepper, diced
1-14oz can of diced tomatoes, or whole tomatoes pureed
1/4 cup fresh cilantro, chopped
3 1/2 cups vegetable broth
1 tbsp cumin
1 tbsp salt

1. Heat oil on medium heat in a large pot. Add the rice and stir constantly until it browns.
2. Add the onions and garlic, stir 2-3 minutes.
3. Add the peppers, stir 2-3 minutes.
4. Add the tomatoes, and stir another 2-3 minutes.
5. Add the broth, cilantro, cumin, and salt. Reduce to medium-low, cover and cook until the rice has finished cooking and most of the liquid is absorbed. This can take anywhere between 45 minutes and 1 hour.
6. Remove from heat and let the mixture sit with the lid on for 10 minutes.

Black Bean and Corn Taco Filling
1-15oz can black beans, drained and rinsed
1/2 bag of frozen corn
1 medium onion, diced
1/2 red pepper, diced
1 jalapeno, minced
1/4 cup fresh cilantro, chopped
1 tbsp cumin
1 tbsp chili powder
1/2 tsp cayenne
1 tsp garlic powder
1/2 tsp salt
1-2 tbsp olive oil

Mix everything together in a medium pot and place over medium-low heat. Stir until everything is cooked through and hot, about 10 minutes.

Saturday, March 9, 2013

Delicious Dinner and Dessert at Kindfood


It is difficult to believe that I haven't blogged about Kindfood until now as it is one of my favorite restaurants! I live about 30 minutes away and I still try to visit this vegan food haven at least once a month or anytime I'm in the Burlington area. Tonight, one of my best friends, Shannon and I enjoyed a delicious and healthy dinner at Kindfood, followed up by dessert of course!

Kindfood is an all organic, gluten-free, and vegan restaurant that is recently renovated (looks fantastic!) and open for business Tuesday-Sunday during the day, and is now open for dinner in the evening on Wednesday, Thursday, and Friday. I've enjoyed lunch on several occasions at the cafe and this was my first time going for dinner. The cafe now has multiple tables and it is set in a welcoming and cozy environment.

Both Shannon and I couldn't resist ordering the Mac 'N Cheese that came along with a side Caesar salad. The Caesar salad is "Romaine tossed in Kelly’s FAMOUS Cashew Caesar dressing, sprinkled with Brazil nut Parmesan and house-made quinoa croutons." The Mac 'N Cheese is ooey-gooey with vegan cheese and is also topped with that yummy Brazil nut Parmesan. The meal was incredibly satisfying, delicious, and healthy...it was that classic comfort food that I had been craving!

Shannon with her pasta and salad dinner!
Of course, once we were finished dinner, we had to go for some dessert! I was craving some brownies or cupcakes baked from Kelly's Bake Shoppe (baked goods sold at Kindfood from their bakery that's located nearby, where you can find sooo many yummy vegan goodies!) - but they are so popular, that they sold out earlier in the day! Thankfully, there were some raw dessert options on the menu that certainly did not disappoint!

Raw Salted Caramel Cheesecake

Raw Chocolate Cake with Cashew Cream Sauce
Shannon ordered the Salted Caramel Cheesecake and I ordered the chocolate lover's dream cake, the Chocolate Cake with Cashew Cream Sauce. Naturally, we sampled each other's dessert so I was able to try both - they were both absolutely divine!

Me with my dessert!

If you're looking for a vegan restaurant to try out, I would highly recommend visiting Kindfood in Burlington, Ontario...and take a trip down the street to Kelly's Bake Shoppe while you're at it! You'll find fresh fruit smoothies, salads, sandwiches, quinoa bowls, soup, chili, burgers, and so many fantastic lunch or dinner options!  They also have a fridge and freezer section stocked with their own take-out meals, as well as many vegan essential food items.

I always like taking home some cupcakes with me and even though they were completely sold out at the cafe...as it turns out, they had five left in the freezer! I bought all of them!

Vanilla, Chocolate, and Coconut-Chocolate Cupcakes!
Kindfood is located at 399 John St., Burlington ON and Kelly's Bake Shoppe is at 401 Brant St., Burlington, ON. You can also find Kindfood and Kelly's Bake Shoppe on Facebook!

Thursday, February 28, 2013

Miso Soup


A bowl of soup is so warm and satisfying, especially throughout the chilly winter months. People should consider replacing that bowl of chicken soup with a way healthier bowl of miso soup! Miso soup is a staple in Japan and you'll find it in Japanese and sushi restaurants. It is often served at the beginning of the meal as a digestive aid. Thankfully, miso soup is super easy to make at home and I would eat it every day if I could!

From Care2, here is a quick list of the top ten benefits of eating miso soup:

1. Contains all essential amino acids, making it a complete protein.
2. Stimulates the secretion of digestive fluids in the stomach.
3. Restores beneficial probiotics to the intestines.
4. Aids in the digestion and assimilation of other foods in the intestines.
5. Is a good vegetable-quality source of B vitamins (especially B12).
6. Strengthens the quality of blood and lymph fluid.
7. Reduces risk for breast, prostate, lung and colon cancers.
8. Protects against radiation due to dipilocolonic acid, an alkaloid that chelates heavy metals and discharges them from the body.
9. Strengthens the immune system and helps to lower LDL cholesterol.
10. High in antioxidants that protects against free radicals.

Here is my quick recipe to make a bowl of miso soup! This recipe makes one bowl - double the recipe if you're making this for two people. You'll need:

-  2 cups of water
-  2 tbsp of miso paste (yellow or white miso)
-  a couple of green onions, diced
-  1 tbsp Wakame (sea vegetable, available in the Japanese section of the grocery store)
-  1/4 block of extra-firm tofu, chopped into cubes (optional)
-  a few mushrooms (optional)
-  chopped garlic rounds (optional)

The key to preparing miso soup is not overheating the miso paste. You don't want to heat this soup, especially the miso, beyond a certain point as the heat will kill all of the beneficial enzymes that makes this soup a nutritional powerhouse.

Bring the water to a boil in a saucepan along with the Wakame, green onion, tofu, mushrooms, and garlic. Simmer until the mushrooms are soft. Reduce the broth to low.

Scoop one cup of broth from the pot out and add the miso paste to it. Stir with a spoon until the miso dissolves. Put the miso/broth back into the pot and stir for 2-3 minutes on low. Do not bring back to a boil as this will kill the nutrients in the soup!

Sunday, February 17, 2013

Smoked Tofu with BBQ Sauce Wrap


This dinner was definitely a culmination of what was in the fridge at the time. Thankfully, it was super tasty and will be one to make over and over again! It is really hard to tell from the pictures what is inside the wrap. It is smoked tofu cooked in BBQ sauce, sauteed veggies, and a Vegenaise-sriracha mixture as an additional dressing.

This dinner is a great way to use up those extra veggies in the fridge! Plus, it is satisfying and delicious. And you don't need to many fancy ingredients. You can substitute regular tofu instead of smoked tofu (although I do recommend the smoked tofu!), or you can use tempeh or Gardein chik'n strips. Pick your protein!


Ingredients:

1 package of smoked tofu, cut into strips
oil for frying (I used grapeseed oil)
BBQ sauce (I used half a bottle of maple chipotle BBQ sauce)

1/2 onion, into slices
1 baby bok choy, chopped
1/2 yellow pepper, into slices
3 cloves garlic, chopped
handful of shiitake mushrooms, sliced

tablespoons of Vegenaise, with 1 tsp of sriracha mixed in, to taste for spiciness

Directions:

Heat a frying pan with some oil on medium heat and saute the strips of smoked tofu, until browned on both sides. At the same time, heat a separate pan with some oil and saute up all of the veggies.

When the tofu is browned, add the BBQ sauce to the pan. Reduce the heat to low. Let the tofu marinate in the sauce, flipping the strips over when necessary, 5 minutes. Spoon the BBQ sauce over top of the tofu after flipping.

Assemble the wrap - put a few slices of tofu in, then your sauteed veggies, and then a bit of the sriracha-vegan mayonnaise mixture.  Serve and enjoy!


Friday, February 15, 2013

Black Pepper Tofu


I regularly get emails and newsletters from VegNews - I highly recommend joining their email list since you'll receive all kinds of recipes, the latest news about vegan products, and articles regarding all things vegetarian! This recipe showed up in my inbox one day and I ended up making it that night! I've been looking for new tofu recipes aside from my usual stir fries and this one was very appealing. It originally appeared in a fantastic vegan recipe blog called Thursdays with Wanda.


If I had to make this dish again, I would definitely use way less black pepper. Now, I'm a girl who loves her meals spicy, but I did find this to be a bit too much for me to handle. I would reduce the amount of black peppercorns to one tbsp instead of three. I also used half of a red onion in place of the shallots, and a bunch of green onions in place of the leeks. I used only 2 tbsp of soy sauce and a little bit more ginger than the original recipe as well. I put the tofu over top of steamed broccoli and bok choy, as well as brown rice. Here is a link to the original recipe, but I will post my modifications below. All in all, it was a very easy recipe to make that would work great after a long day at work. It is very filling and nutritious!


Ingredients:
1 package firm tofu
1 tablespoon fresh black peppercorns
1 teaspoon red pepper flakes
5 cloves garlic, minced
1/4 cup olive oil
2 tablespoons soy sauce
1 teaspoon brown sugar
1 teaspoon rice vinegar
1" fresh ginger, minced
1/2 red onion, minced
1 bunch green onions, cut into 1" sections

Directions:
1. Cut the tofu into small blocks and let them drain on paper towels for 15 minutes.
2. Make the sauce: Crush up the black peppercorns into coarse flecks with your mortar and pestle (or in a spice grinder), then mix in the red pepper flakes, minced garlic, olive oil, soy sauce,brown sugar, and rice vinegar.
3. In a pan over medium high heat, swirl in some oil and then sear the tofu in batches until all sides are crispy, or about 2 minutes per side.
4. Add the ginger and onion to the tofu and saute for 2 more minutes. Add the sauce and the green onions. Cook for 5 more minutes. Add more soy sauce to taste.
5. Serve over some brown rice, and steamed veggies (I used bok choy and broccoli).

Tuesday, February 5, 2013

Vegan Gyoza and a Japanese-Themed Dinner


It all started with a trip across the border to Trader Joe's. We don't have any Trader Joe's stores in Canada, or any just across the border from Southern Ontario/Toronto area. The closest store is in Rochester, New York, so sometimes a road trip is in store and so is a fun grocery shopping trip!

I went to Trader Joe's for the first time last summer when on a little vacation to Put-in-Bay, Ohio with one of my best friends. We stopped at a location in Cleveland and I came home with bags full of vegan snacks that were entirely different from what I could find at stores at home. This visit was similar to that time as I exited the store with Vanilla Jo Jo's, Onion Ring chips, Roasted Coconut Chips, an assortment of various Clif bars, and all kinds of other goodies. Amongst those goodies was this bottle of Trader Ming's Gyoza Dipping sauce. With the inspiration of using this sauce for dinner, I decided to attempt to make vegan gyozas from scratch. A gyoza is an Asian dumpling filled with all sorts of sauteed veggies.

What started with an idea of making vegan gyoza resulted in tonight's dinner: a full-out Japanese buffet of gyozas, sushi, and soba noodles! It was a bit time consuming and resulted in a lot of dirty pots and pans...but it was incredibly delicious and well worth the work!

Vegan Gyoza!
Since I was unable to find wonton wrappers without egg in them (you might be able to find these at an Asian grocery store), I opted to make mine from scratch. I used this recipe from VegWeb and it turned out great. I also used this recipe for the filling. You will need a LOT of elbow grease when you're kneading the dough (unless you have a dough-kneading attachment for your stand mixer or a bread maker!), and you will also need a lot of elbow grease for rolling out the dough. The dough is very firm and difficult to roll out, but try your best. I was able to come out with about 12 three inch squares, along with some leftover dough. You should be able to get at least 16 squares, depending on how strong you are!

Vegan Wonton Wrappers

2 cups all-purpose flour
1/2 tsp salt
1/2 cup warm water

1.  Sift together the flour and salt in a bowl. Slowly stir in the warm water. The dough will be very stiff.
2.  Knead the dough on a floured surface until smooth, about 15 minutes. Put the dough back into the bowl and cover it with a towel. Let the dough stand for about 20 minutes.
3.  Roll out half of the dough as thin as you can. Cut into 3" squares using a pizza cutter or knife. Repeat for the other half of the dough. You can also use this recipe to make spring rolls, just cut the dough into bigger squares.

Vegan Gyoza

2 tbsp oil, divided
1/3 cup carrots, finely chopped
3-4 cloves garlic, finely minced
1/3 cup celery, finely chopped
1 tbsp sesame oil
1/2 cup shiitake mushrooms, finely chopped1-2" piece ginger, peeled and finely chopped
red pepper flakes, to taste
black pepper, to taste
1/4 cup green onions, finely chopped
2 tbsp tamari
wonton wrappers (store-bought or from recipe posted above)
2-6 tbsp water, for steaming

1.  To prepare the filling: Over medium-high heat, add 1 tbsp of oil to a hot skillet. Once the oil is hot, drop in the carrots and garlic and cook for 4 minutes, stirring constantly. Add the celery and cook for 2 minutes, stirring constantly. Next, toss in the sesame oil, mushrooms, cabbage, ginger, black pepper, and chili flakes and coat well with oil.
2.  Cook this mixture for another 2 minutes, then add in the green onions. Stir in 2 tbsp tamari. Once all of the veggies are soft, transfer to a bowl and allow to cool for 10 minutes.
3.  Please a tsp of filling in the center of each wonton wrapper. Moisten the edges with a little bif ot water, fold over, and crimp the edges to seal.
4.  To cook: Add 1 tbsp of oil and heat over medium-high. Drop in your dumplings and cook for 2-3 minutes per side until lightly browned. When both sides are lightly browned, add in 2-3 tbsp of water and cover with a lid. Turn the heat down to medium and allow the water to completely evaporate.

*** Please note *** These are the instructions for the original recipe. I found that adding water to a hot pot with oil in it was a little bit too dangerous for me. I recommend steaming the gyozas by using a separate steaming pot over a pot of boiling water.

5.  Gyozas are done when they are entirely translucent. If there are still opaque parts,  add more water, cover and cook. Flip them over if they get too brown on one side. You may have to repeat this process. If you're using a steaming pot, flip them as necessary.

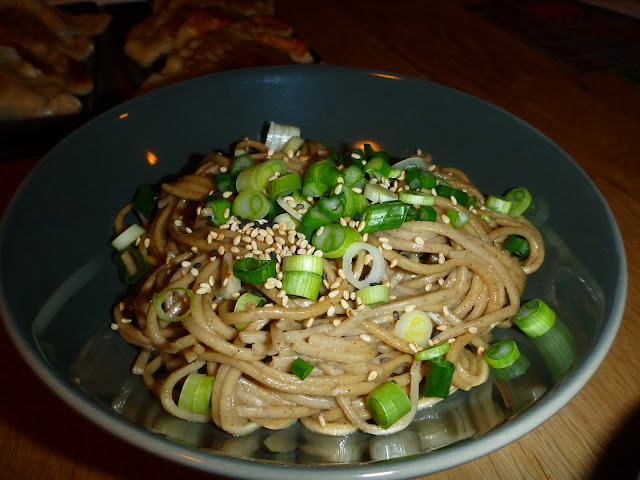
Sesame Soba Noodles with Green Onion

Soba noodles are a healthy buckwheat noodle used in Japanese cuisine. You should be able to find them at most grocery stores. Cook the noodles according to the directions on the package. Drain the noodles, then add them back to the pot along with some sesame oil and soy sauce. Heat through and serve. Top with chopped green onions and toasted sesame seeds.

I actually ended up adding some of the Trader Joe's Gyoza sauce to the noodles and it was absolutely delicious! It added a nice kick of ginger and more sesame flavour. Yum!
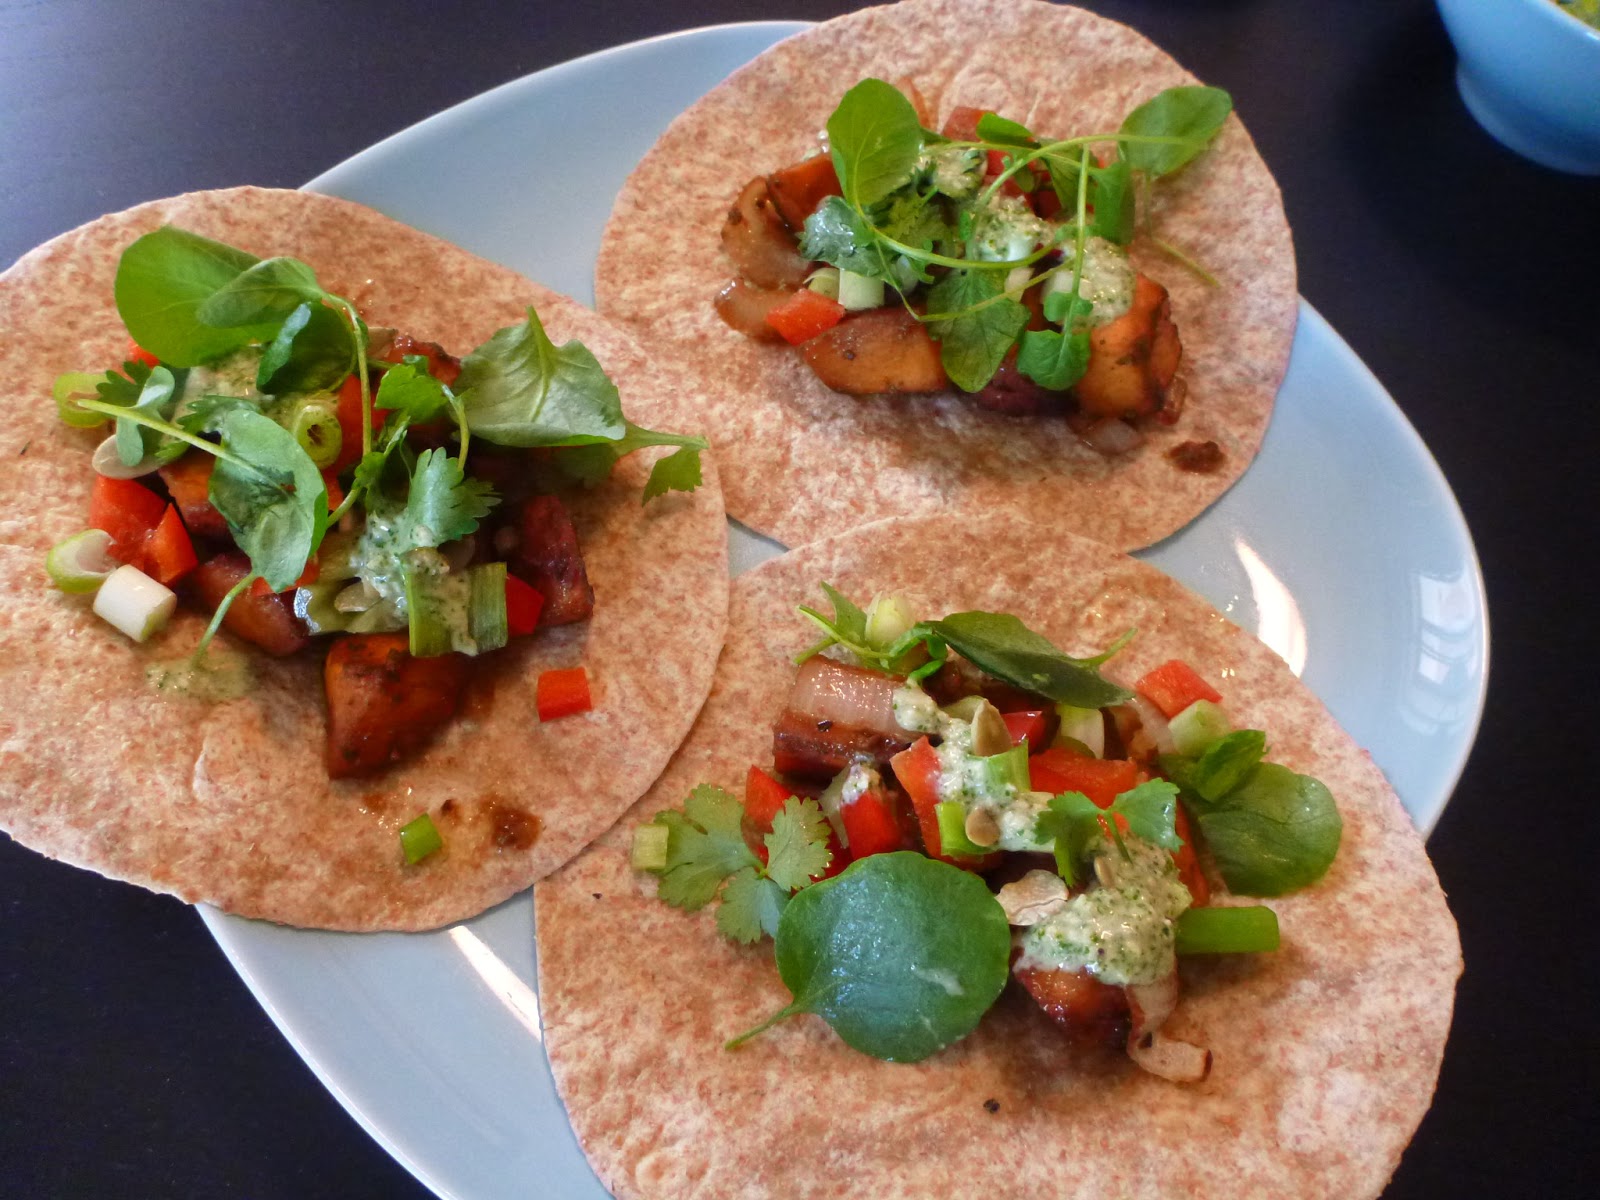
Veggie Sushi!
Making veggie sushi is not as hard as it looks! All you'll need is sushi rice, veggies to put inside (cucumber and orange/yellow pepper), and nori (seaweed) papers to wrap everything up. You can also put some toasted sesame seeds inside.

Cook the sushi rice according to the directions on the package. Using 1 cup of uncooked sushi rice will make you more than enough rice to make sushi. Once the rice is cooked, put it into a bowl and add 2 1/2 tbsp of seasoned rice vinegar and 1/2 tbsp of sugar.  Let the rice cool down.

On your nori sheet, lay out a row of sushi rice, and then your cucumber and pepper slices. Add some toasted sesame seeds. Then, put a little bit of rice vinegar along the top edge (where you have put your rice and toppings down) in order to allow it to stick together when you roll it all up. You can use those fancy tatami mats to roll up the sushi, or you can just use plastic wrap. Roll up the sushi. Then, you can cut it into 8 bite-sized pieces.

There are tons of books and websites about making sushi. I have a great book called Vegetarian Sushi that outlines the basics of making sushi and includes tons of different recipes for many veggie rolls.


And there you have it - a dinner that can rival any that you would find at a Japanese restaurant, and one that definitely has no meat or fish in sight!